Showing posts with label Vegetables. Show all posts

Monday, October 31, 2011

Eating a Jack-o-Lantern

Two ways I eat my jack-o-lantern.

First, when hollowing out the pumpkin, I save the seeds.  A nifty trick for separating the seeds from the stringy pumpkin guts: throw the whole mess in a large pot of water.  If you rub the mass between your hands, you loose the pumpkin flesh from the seeds, which float to the top and can be easily skimmed off.  Dry them on a bake sheet lined with paper towel overnight, then toss with oil and seasoning and roast until golden brown.

Second, in years past, after the trick-or-treaters have stopped calling, I've taken my jack-o-lantern off the step, cut it in half, and roasted it in the oven.  Eating quality of carving pumpkins seems to vary, but most of the time the flesh tastes good, and can be puréed and converted to pumpkin soup or pie.

Saturday, October 1, 2011

Sunflowers: A Failed Experiment

When I was little I watched cartoons on Saturday mornings.

At one o'clock custody of the television passed to my mother, who watched Victory Garden, an American public television show that tours some of America's greatest gardens.

I hated this show.

Now that I'm all growed up, I rather like it.  A couple years ago I was watching Victory Garden when they interviewed a chef from Boston who used sunflowers like artichokes.  I filed this idea in the deeper recesses of my brain until this summer, when I came into some sunflowers from Tipi Creek.

I pulled out the flower petals, then started cutting away the dark brown seed heads until I had something that looked sort of kind of a little bit like an artichoke:


As a controlled taste-test, I simmered this flower head in lightly salted water until tender.

The result was pretty gross.  A slightly slimey texture, an off-putting, floral taste (duh...)

If anyone out there knows how to prepare sunflower heads, I'm all ears.

Sunday, September 25, 2011

Harvest Day at Tipi Creek 2011

September 24 was the last harvest day at Tipi Creek CSA for 2011.  We look forward to this every year.  Our Thanksgiving dinner is planned largely around what we take home that day.

Of the three years we have been members of the Tipi Creek CSA, this was the least productive.  You'll remember that May through July was cold, wet, and dreary.  While this was mitigated to some extent by the sheer variety of vegetables grown, overall we ended up with a lot less produce than in previous years.  That being said, with August and September being hot and sunny, we still had a fantastic final harvest day.

Here's more information on Tipi Creek:
Below are some photos from the harvest day.  Thank you, Ron and Yolande, for filling our larder with fantastic vegetables.  Can't wait for next year.


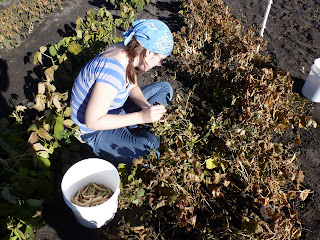
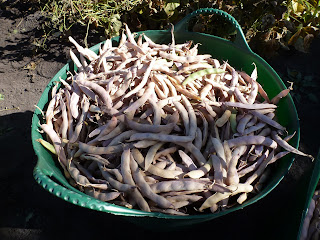
Dry Cherokee Beans

Picking the Cherokee beans

A basket of dried Cherokee beans


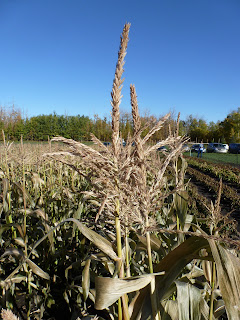
Corn

Corn tassles

A brimming bag of corn cobs

Lisa enjoys an ear of corn straight from the stalk


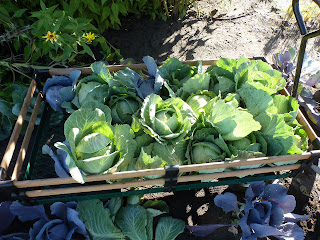
Cabbage (my favourite...)

A wagon of cabbage heads

 A truck load of cabbage heads


Cabbage's Half-Brother, Kohlrahbi 


Beet's Half-Brother, Chard


Greens


The Pumpkin Patch


Sunday, September 18, 2011

Vegetable Off-Cuts

Carrot tops and parsley
One of the benefits of getting vegetables from a CSA, farmers' market, or backyard garden, is that you often get the entire plant.

As with animals, there are parts of certain vegetables that are usually thrown out.  The most common examples are the green leaves of vegetables that are grown for their roots or stalks.  These greens deteriorate quickly after picking, so they're cut off before the vegetables are shipped to the supermarket.

Of course, not all vegetable off-cuts can be eaten.  Some are poisonous (the leaves of the nightshade family, including potato and tomato), and I find that some that do make their way to the farmers' market are of dubious eating quality.

Let's start with the good ones.  Here are some vegetable off-cuts I like, and some ideas on how to use them.
  • Beet Greens - Primo greens.  Much like Swiss chard, with colourful, tender, stalks.
  • Celery Leaves - One of my favourite greens of all time.  The leaves from the light green heart are especially good.  They are tender, and taste more like celery than the stalk.
  • Onion Greens (not to be confused with green onions...) - Green onions are a variety of allium developed for their long green shoots.  Varieties of onion grown for their bulbs (eg. Spanish, White, Walla Walla) still have edible greens, though they rarely make it to the supermarket.  They aren't as tender as green onions, but they still make for good eats, especially when folded into dough and deep fried.
  • Horseradish Greens - I was surprised when I saw these at the farmers' market.  They taste remarkably similar to the root, though with less pungency.  They can be used sparingly in green salads, or minced and folded in a compound butter for steak.
  • Radish Greens - Peppery taste similar to the radishes themselves.  Good as salad greens, or chopped and mixed into radish butter.

I've seen the following greens for sale at farmers' markets, or have tried them at Tipi Creek, and found that they have inferior eating quality.  If you've successfully prepared any of the veg below, I'm curious to know how you did it.
  • Carrot TopsSome sources say you can make soup with carrot tops, though I find them too tough.  My only success with carrot tops has been in making a flavoured oil.
  • Kohlrabi GreensThese walk the line.  I find them too tough, whether raw or cooked.
  • Cabbage Greens - By "cabbage greens" I mean the large leaves at the base of the stalk that fall away from the head.  Like kohlrabi greens I find them too tough, even when braised.
  • Broccoli Greens - I've heard people rave about broccoli greens, but I've found them inedible, even with extended cooking.  I think maybe the young greens that are taken while thinning the garden are good, but the leaves taken once the plant has gone to seed are fibrous.

Monday, September 12, 2011

Rhubarb Leaves: A Thought Experiment

Rhubarb leaves, considered poisonousBefore I say anything else, please, please, please don't eat rhubarb leaves.  They're considered poisonous.

That being said, I have a theory that I'm working out.  I'm wondering if there is a way to prepare rhubarb leaves so that they aren't poisonous.

I started thinking about this after reading about taro.  Taro root is a tuber native to India, but common in the cuisines of the Caribbean, South America, Polynesia, and much of Asia.

Taro, both the tuber and the leaves, contain a large amount of calcium oxalate.  When eaten raw they burn your mouth and throat, but boiling them dissolves the oxalates and renders them safe to eat.

Rhubarb leaves also contain a large amount of oxalate, and according to most sources this is the chief reason they are considered poisonous.  If it is this soluble compound that makes rhubarb leaves unsafe for consumption, we might be able to boil the leaves and drive off the toxin, just as in taro leaf preparation.

As I mention in my disclaimer, I'm not a chemist or a botanist.  For all I know the oxalate content of rhubarb leaves is too high for boiling to be effective.  Or maybe there are other compounds that are responsible for its toxicity.[1]

I have no idea.  I don't plan on testing it out myself.  I'll leave it for the food scientists.  (Though of course no one is studying rhubarb: it's a hardy perennial that already grows in most backyards, and there's no money to be made from it.)

I'm just wondering out loud.


1. McGee, Harold. On Food and Cooking. ©2004 Scribner, New York. Page 367.

Wednesday, August 17, 2011

Squash Blossoms

If any food can be described as ephemeral, it's squash blossoms.  They're only around for a short while, and once picked they deteriorate rapidly, which is why you usually can't get them at grocery stores, only farmers' markets and neighbourhood gardens.

Squash plants actually produce two different types of flowers: male and female.  The male flowers grow on the end of long, slender stems.  The female flowers grow on thicker stems that buldge where they meet the flower.  This bulge is what will eventually become a squash.

Generally there are more male flowers than female.  The male flowers can be picked without affecting the production of fruit, so long as a few are left behind to pollinate the females.  Some sources say to remove the stamens from the interior of the male flowers before eating.  I don't.  I hope it's not a safety thing.  Picking the female flowers will prevent fruit from developing on that stem.  Even so, it's worth picking a few females, especially once the buldge on the stem has grown into a tiny, malformed squash.

The flowers of both summer and winter squash are edible.  (Summer squash are varieties that are picked young, and therefore have tender, edible seeds and skin, like zucchinis and pattypans.  Winter squash are varieties that are mature when picked, and therefore have tough, inedible seeds and skin, like butternut squash and pumpkins.)

While they can be eaten raw, squash blossoms are usually lightly battered and fried.  They can also be stuffed.

Below are two blossoms from a pattypan plant.  The flower at the back is female, as you can see from the small, green pattypan attached to the base.  The front flower is male, with the characteristic long, slender stem.

The blossoms are filled with a homemade ricotta (something my ancestors would have called "clabbered milk") mixed with lemon zest, lemon juice, an egg, and basil.  I used a piping bag to stuff the flowers.

The batter is just skim milk thickened with a bit of flour.  Tempura-style batter is also popular.  The flowers are lightly coated with the batter, then fried in canola oil at 350F.  You can shallow fry in a straight-sided pan (just add enough oil to come about half way up the side of the flowers) or deep fry in a pot.  Once the batter is crisp and the interior hot, maybe one minute, remove the flowers to a bowl lined with paper towel.  Season and consume immediately.

August on a plate:

Tuesday, August 16, 2011

Rhubarb Onion Jam

I've had recipes for rhubarb relish passed to me from both my family and Lisa's.  Though one is from Ontario and the other from Alberta, they are uncannily similar: one part chopped rhubarb and one part chopped onion, stewed together with cinnamon, clove, and other "pumpkin pie" spices.

This has been my default rhubarb sauce to accompany meat and hearty bread for the past couple years, but I have to admit it's not a show-stopper.  I've been trying to elevate this recipe, and a friend of mine recently found the way.  His discovery of rhubarb onion jam was one of those rare times when something in the kitchen goes horribly wrong, but the food turns out better than if all had gone according to plan.  I think many of our favourite foods were probably discovered this way: grape juice was left out, and mysteriously started to ferment; dry leaves fell into a pot of boiling water; or a marshmallow was accidently impaled on a stick and left too close to a campfire.  Rhubarb onion jam resulted from a similarly serendipitous mistake.

The mistake was that a pot of simmering rhubarb relish was left unattended for an hour.  By divine providence the pot was covered, and enough moisture trapped within that the relish didn't really burn, but rather stuck to the bottom in a thick mat of caramelized "jam."  With a little water and scraping, that jam was retrieved and found to be delicious.

This happy accident can be reproduced in a controlled manner through an intensive cycle of developing and capturing fond.  Remember that word, "fond"?  The one with the nasal "on" and the silent "d"?  We discussed it briefly here.

To create good fond, you need a stainless steel pan.  To capture it, you need a wooden spoon, and possibly some liquid.

Start with the abovementioned ratio of rhubarb and onions.  Cook them in a bit of hot oil.  When the rhubarb and onions have broken down to a paste, spread them evenly across the surface of the pan.  Once a layer of caramel-coloured fond has developed on the bottom, use the wooden spoon to scrape the fond into the paste. Redistribute the mixture and repeat.  If the fond is difficult to remove, add a few tablespoons of water; they should help lift the sticky residue off the pan.


The mixture will slowly darken and thicken.  Continue the process until a jam-like consistency is achieved.  I finished the mixture with honey, to balance the concentrated tartness of the rhubarb.

The rhubarb and onions shrink dramatically in the process.  Starting with 300 g onions and 300 g rhubarb (about four cups of ingredients all told), I finish with less than one cup of jam.

Rhubarb onion jam gets along famously with cornbread and pork.

Monday, May 16, 2011

Dandelion Salad

At left is the first harvest from the yard, largely rhubarb and dandelions.

When picked young dandelions are tender and bitter, with a slender red stalk. Classically, they are often served with bacon, garlic croutons, hard-boiled egg, and vinaigrette.

Here's a variation on that theme.

Firstly, in addition to the greens, this year I gave the roots and flowers a go.  The roots have the same bitterness as the leaves, obviously with an added crunch.  The flowers are very fun to eat.  They have a slight sweetness

Instead of the classic hard-boiled egg I used a soft-poached quail egg.  When broken, the yolk runs through the leaves and tempers their bitterness.

The dressing was made with cider vinegar, a touch of mustard, a touch of bacon fat, and canola oil

Instead of bacon I used pig's ear.

I should tell you a bit about pig's ear.

When I make headcheese, I simmer the entire head of the pig.  To make the soft, creamy version of headcheese that I enjoy, I include mostly the jowl fat and the tender meat.  I exclude parts of the head that will conflict texturally, notably the ears, which have cartilage in the them.

Since they have been simmered extensively, these bits of ear were coated in seasoned flour and fried crisp.

At first bite, the fried ears are not much different than crispy bacon. Once you reach the centre there is the distinct crunch of the cartilage.  A very interesting eating experience.

This salad goes well with weissbier.


Monday, October 4, 2010

CSA v. Farmers' Market v. Supermarket: The Numbers

Cucumbers from Tipi Creek Farm and bell peppers from the Old Strathcona Farmers' MarketWe've finally crunched the numbers: we weighed every gram of food we received from our CSA share at Tipi Creek, then found prices for equivalent goods from a farmers' market and a grocery store.

The results surprised me. I expected that the grocery store would be by far the cheapest, and that the CSA would be only slightly cheaper than the farmers' market. In reality, the grocery store was marginally cheaper than the CSA, while the farmers' market was much, much more expensive. The final costs were:

  • CSA Cost: $600
  • Farmers' Market Cost: $1044.73
  • Grocery Store Cost: $510.76

I was shocked to see how close the CSA and grocery store prices ended up. Obviously I always knew the farmers' market was more expensive that the supermarket, but I didn't think it was twice the cost. Yikes. These numbers make me want to give Ron and Yolande at Tipi Creek a hug.

All the raw numbers are in the spreadsheet at the bottom of this post. Before looking at the spreadsheet, please read the information below on our collection process and some sources of error.


The Data Collection

When weighing vegetables from the CSA, only the weight of the commonly used part of the vegetable was measured. The weights listed for beets, for example, are the weights of the root portion only, without the greens, even though the greens are good eats. This was done for easy comparison to grocery store items, which are usually sold leafless (it's hard to keep the leaves looking fresh when they've travelled so far...) Other examples: kohlrabi leaves and carrot tops.

The grocery store prices were collected from the Garneau Safeway on Whyte Avenue in September.
We used this store as it is our main source of groceries outside the CSA and farmers' markets. From previous cost analysis projects, we know that this store is generally more expensive than others in the city (like the Sobey's down the street). Most produce is sold at a set price per kilogram, which made data collection easy. Exceptions are parsley and radishes, which are sold in bunches of unmarked weight. These items required visual estimation, and may be a small source of error. All grocery store prices are for conventional produce, ie. not the more-expensive "organic" produce.

Farmers' market prices
were collected at the Old Strathcona Farmers' Market from July through October. Because of the informal pricing scheme most vendors use, the farmers' market prices are by far the least reliable numbers in the study. Only a few vegetables are sold by weight, most being sold per "bunch" or "bag". To collect data we would find, for instance, a head of butter lettuce, and say, "That's about how much butterleaf we got from the CSA this week," and note the price. Not an exact science, clearly. Prices for given vegetables were fairly consistent among vendors. If there was a variance, we took the middle-of-the-road price.


Hidden Costs and Benefits of the CSA

There are some costs to the CSA outside the money paid at the beginning of the growing season: the gas used to drive to the farm and to the weekly pick-up location, and the time and resources spent processing the vegetables at home. Most of the vegetables have to be thoroughly washed. Freezing extra vegetables (a must when only two people are sharing the produce) requires blanching in boiling water, shocking in ice water, then plastic bags for storage. Items like leafy greens and herbs are loosely wrapped in paper towel and kept in an open plastic bag. We went through a lot of paper and plastic.

There is also the time spent working at the farm (four sessions lasting maybe three hours each). Of course, we think that time adds to the value of the CSA share. After all, you get to drive into the country, you can visit as you work, and some work days end in a potluck. I just thought I would mention the time for the sake of economic completeness.


Quality Factor

It should also be noted that the quality of produce received from the CSA and farmers' market was of superior quality to the grocery store. This was especially true of carrots and corn.


The Data

Okay. With the formalities out of the way, feel free to peruse the raw data by clicking on the image below. Please let me know if you have any questions, comments, or suggestions for future data collection.


An image of the spreadsheet comparing CSA, farmers' market, and supermarket costs

Wednesday, September 29, 2010

Caragana

A caragana pod in Hawrelak ParkCaragana has a reputation similar to that of poplar trees, verging on "weed" status. The growth has a spiny appearance that most find unattractive. The plants sucker, and produce exploding pods that throw seeds everywhere. Plus they require lots of trimming just to stay presentable.

Caragana is native to places like (go figure...) Siberia, and was brought to the Canadian west in the 1880s.[1] It is extremely drought-resistant and was used extensively in farmhouse shelterbelts. I would guess that it's the second most common hedge in Edmonton, after cotoneaster, though you are much more likely to see it in older communities like Garneau than, say, Terwilliger. It also grows wild in the Edmonton river valley.

In the early summer, caragana shrubs grow slender, green, bean-like pods. In late summer the pods turn brown, thin-skinned, and brittle. The seeds within develop a fantastic flavour that reminds me of green pea and asparagus, with a profound, sweet, nuttiness. For a short while I eat them raw from the shell. As they dry further, they have to be boiled like other legumes.

After the pods have thoroughly dried, they burst and release the seeds. This bursting is actually quite dramatic. The first time I picked caragana I collected the pods in a large glass jar. Every so often there was a popping sound, and some of the pods would jump out of the container. I kept picking through the jar because I thought a grasshopper had fallen into it. After popping, the two halves of the pod twist around themselves to resemble spiral shank nails. (If you click on the above photo, you can see some twisted pod shells in the top left corner.) Obviously, the pods need to be collected before they burst.

So here's the catch: the pods contain maybe six seeds that are each about a half centimeter across. Foraging is tedious, to the point that I don't know if you would realistically collect enough seeds to serve as a legume dish for dinner. They might be better scattered through salads. Depends how persistent you are, I guess.

As I write this, the caragana are throwing the last of their seeds onto the autumn ground. If you hurry, you can have one last taste to contemplate over the winter.


Reference
1. Skinner, Hugh, and Williams, Sara. Best Trees and Shrubs for the Prairies.
©2004 Hugh Skinner and Sara Williams. Page 73.

This has been my go-to book for information on local trees and shrubs for a few years now. It has an ornamental bent, and is very conservative on edibility issues. It makes no comment on caragana's edibility.

Sunday, September 26, 2010

Harvest Day at Tipi Creek CSA 2010

A cabbage-headed scarecrow at Tipi Creek FarmThis past Saturday was the last harvest day at Tipi Creek CSA. All the remaining vegetables were picked and divided amongst the shareholders.

As one of our farmers put it, this was a mushroom year, and a cold crop year: we got lots of moisture, but very little heat. Hence the plentiful, but mostly green, squash. The last few weeks of overcast drizzle stalled two of the corn varieties, and the fall spinach. Other crops, notably cabbage and broccoli, flourished in the cold. Risk is mitigated by crop diversity.

Here are some photos and notes from the harvest day.

Potatoes

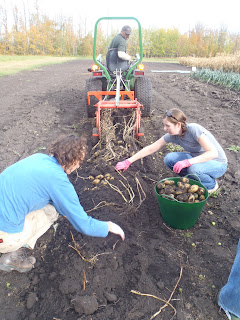
With the potato foliage long killed off, a potato digger is dragged over the rows. The digger lifts masses of earth and potato, then sifts the dirt out and drops the potatoes on top for easy picking.
Dragging the potato digger to unearth potatoes
Note how black the earth is (we now have several pounds of this dirt in our kitchen, under our fingernails, and in our shoes...)


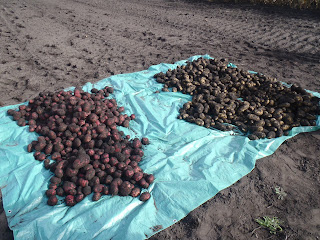
All the potatoes, spread on a tarp
Once all the potatoes are collected, some choice round specimens are saved as seed potatoes for next year. They will be stored over the winter to grow eyes.


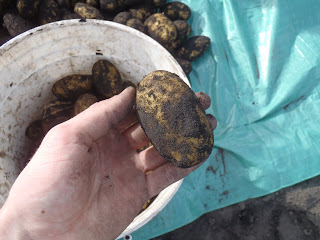
A round, uniform potato, ideal as a seed potato
Embarrassingly, this was the first time I'd ever seen the fruit of the potato plant. Apparently they're poisonous.


The fruit of the potato plant


Kohlrabi


Kohlrabi plant

Green Onions
Green onions

Cabbage

Cabbage
The larger, tougher cabbage leaves from around the head are piled up to be fed to the pigs. (Other porcine favourites: corn and apples. No wonder those flavour pairings work so well.) Other vegetable trim is composted.
Large piles of cabbage leaves which will be fed to the pigs
Pumpkins, Hubbard, Buttercup, and Spaghetti Squash

A trailer-load of pumpkins and squash

Corn
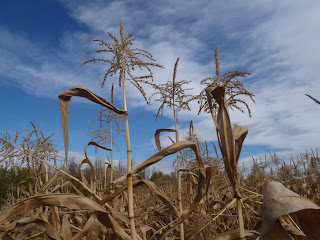
Corn tassles
Fresh-picked corn on the cob
A Salamander (Not a part of regular CSA shipments...)

A salamander found digging in the carrots
The Numbers

As planned earlier in the season, Lisa and I weighed every bit of produce we received so that we could compare our CSA cost to that of an equivalent amount of food from the farmers' market and grocery store. With all our harvest in, we can now start the formal comparison. I'm going to review the numbers and post our results this weekend.

A railway in Sturgeon county near Tipi Creek Farm

Friday, September 10, 2010

Preserving Tomatoes

A pan of oven-dried tomatoesTwo years ago, I had no place in my heart for tomatoes. With the stiff, pale burger-garnishes in mind, I wondered how anyone could get excited about them.

Then a few potted tomato plants in the backyard taught me how much heat they need to mature. Once they started to fruit, the woman next door was in awe, as not thirty feet away she had tried to grow tomatoes to no avail. We decided it was the exposed, south-facing cement wall behind my plants, storing heat during the day to pass to the tomatoes at night, that let them flourish. After harvest, I built a special room in my heart for tomatoes, the demanding plants that grow best in greenhouses and small anomalous corners of backyards. They are a luxury, and the crown of the late-summer harvest.

In Edmonton, it's hard to acquire the amount of tomatoes that necessitates preserving. However, for several years my mom has been taking advantage of a boom and bust greenhouse production cycle. She buys from a greenhouse that only produces in summer months, so come September they have a windfall of beautiful tomatoes that are dirt cheap. She's able to buy 40lbs of romas for $20.


Oven Drying

I keep expecting preserving to compromise the eating-quality of fresh ingredients. But, as with other preserves like jam and pickles, I'm left with a fantastic pantry item with an intense, focused flavour. In fact, I think I enjoy oven-dried tomatoes more than fresh ones. The process evaporates moisture to concentrate flavour and acidity, and gently caramelizes some of the sugars. These tomatoes are dynamite in pasta or tapenade, or just on a plate with garlic sausage.

Cut the romas in half and remove the juice and seeds. Strain this mixture and reserve the juice, either to drink or to use in canning (see below). Toss the flesh of the romas in oil, salt, and pepper. Go easy on the seasoning, as the tomatoes will reduce to a fraction of there original mass. Place the tomatoes on a sheet pan lined with parchment or silicon, and put them in an oven on low heat, maybe 200F. Not trusting the thermostat in my oven, I have a high-temperature thermometer clipped to the oven rack. I have to set my dial below 150F to achieve 200F. Leave the tomatoes for several hours, until they develop a dense, chewy texture. This year mine took about twenty hours. Packed in oil they will keep for months.


Canning

Authorities like Bernardin and the USDA say that the pH of tomatoes is on the cusp of acceptable acidity for canning. As such they recommend the addition of lemon juice to the canning liquid, about two tablespoons per quart. From a flavour standpoint, this makes me cringe. I have, however, read testimonies of people who grew up on tomatoes canned without any acid supplements.

I wonder if, since the pH walks the line of food safety, I could give it a bump in the right direction by slightly reducing the tomato juice we can with. Some water boils off, leaving a higher concentration of acidity.

As this was my first year canning tomatoes, I tried a bunch of different recipes. All started by blanching, shocking, and peeling the tomatoes. Then I canned some in water, some in tomato juice, some with lemon, some without, some with herbs and salt, some without.

Friday, August 27, 2010

Pickling Without Vinegar

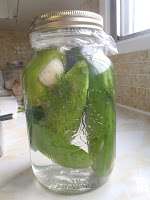
A jar of pickles with garlic and dillCucumbers

I come from a land of "refrigerator pickles": cucumbers steeped in syrupy vinegar and spices, and stored in the fridge through the fall. The idea of producing an acidic pickle with only brine was a revelation.

The procedure couldn't be simpler. Make a brine of one cup salt in one gallon of water. Cover your chosen vegetables in the chilled brine (most vegetables want to float, so you'll have to find a way to keep them submerged) and leave for a week at a cool room temperature. This is the only tricky part: the solution must stay below 23°C to prevent the proliferation of harmful bacteria. I don't have any air-conditioning, so I wait for weeks like this, when it barely reaches 20°C outside, and then crack open the window in my "cold storage room" (also my office, where I am typing this post).

The familiar Lactobacillus bacteria consume something (lactose?) in the vegetables and create lactic acid. Lactobacillus can survive in the saline solution, while most undesirable bacteria can't.

Once the vegetables have reached the desired balance of salty and sour, they are removed from the brine and placed in a new container. The brine is boiled to kill off any pathogens, then chilled and poured back over the vegetables. The pickles will keep indefinitely in your fridge.

That is my only misgiving about this preservation technique: the pickles are not properly canned, and so they tie up fridge space. The bulk of my cucumbers are cooked into syrupy relish, properly canned, and kept in the pantry. It's worth saving a few vegetables for this natural pickling process. The taste is exquisite: delicate acidity and a high crunch-factor.


Cabbage
A jar of home-cured sauerkraut

We're starting to get 5lb heads of cabbage from Tipi Creek. While I have a gargantuan appetite for braised cabbage at this time year (apples come into season, I smoke pork, maybe there's some kohlrabi kicking around...) there's still plenty left over to make sauerkraut by the traditional brining method. This year I tried canning my sauerkraut. Sauerkraut is often cooked before eating anyways, so I figured it will hold up to the canning process nicely.

There's still a nagging voice in the back of my mind, a voice insisting that canning without a recipe is dangerous.

I need a book that liberates me, the home-canner, from recipes. A book that says: "This is the pH, salinity, or sugar content required to safely jar food. This is how to measure the pH of your pickles. This is the approximate pH of common household pantry items. This is how to calculate the pH of your pickling solution." That way, instead of working from a recipe, I could start with a set of ingredients or cured products like sauerkraut and salt pork and test and adjust them to make sure they're safe to can.

Even though I didn't have a recipe for the canned sauerkraut, there are plenty of forums and Youtube videos from the northern US that detail the jarring of traditional home-cured sauerkraut. All the folks in these videos have friendly, trustworthy faces, so I gave it a go.

Thursday, August 12, 2010

Potatoes

Potatoes? You gotta be poor to eat potatoes. Real poor.

-Tuco
Ramírez in The Good, The Bad, and The Ugly


The importance of potatoes to my family was a slow revelation. I always knew from off-hand, quietly resentful remarks that when my parents were young they spent a lot of time tending to potato patches. Only recently did I fully understand the role potatoes played in their lives.

We usually consider bread to be the embodiment of simple, gratifying food. References to bread in European history, mythology, and religion are too numerous to count, but here are some highlights. Ample supplies of bread have often been the foundation of political stability. During the long period of decline, Roman emperors are said to have placated the masses with "bread and circuses," that is, by giving away bread and hosting spectacles like the gladiatorial fights. On the other hand, bread shortages incited riots during the French Revolution, which prompted Marie Antoinette's infamous proposal: "Let them eat cake". The Bible is replete with references to bread, where it is the main symbol of bodily nourishment. The two most notable references are in the Lord's prayer ("Give us this day our daily bread") and the breaking of bread during the last supper before Christ's death, which became the central sacrament of the Christian faith, in the form of communion.

Potatoes, being native to America, were unknown to Europe until the sixteenth century, weren't widely eaten there until the nineteenth century, and even then were considered peasant food. They don't have the benefit of biblical references, to say the least.

My parents grew up on farms in Ontario, and while they baked bread at home, potatoes were the staff of life.
My mom ate potatoes twice a day almost every day of her childhood, usually fried potatoes with lunch and boiled potatoes with dinner.

A diagram of cold-storage bins for potatoesHer family grew them in huge quantities to last the winter. They were stored in the cool basement in crates with three solid walls and a fourth wall made out of slats stacked and held in place by grooves. The potatoes were sprinkled with lime (the chemical, not the fruit) to prevent rot.

With this in mind, I have a dish to celebrate the potato: a dish befitting the nourishing, comforting, hearty character of the tuber. This ain't duchess potatoes or Vichysoisse. I'm talking about a potato broth with dumplings.


Potato Broth with Dumplings


Conversations about potato dishes usually focus on texture (the ideal French fry has a crisp exterior and fluffy interior, the ideal mashed potatoes are smooth but not gummy...)
I love this broth because it makes you think about how potatoes taste. Potato skins are used to infuse a vegetable broth with potato flavour, without any of the thick starchiness we associate with potato soups.

Start with the dumplings. The key to pillow-like potato dumplings is to have as little moisture in the potatoes as possible. This way the milled potatoes will require less flour to form a dough, and there will be accordingly less gluten in the finished dumplings. Use low-moisture, starchy potatoes like russets.

Boil or bake the potatoes whole, with the skins on. Once they are cooked through and still hot, peel away the skins in large segments and mill the potatoes. Clouds of steam will escape in the process, ridding the flesh of excess moisture. Spread the milled potatoes on a sheet pan and cool thoroughly to let a maximum of moisture evaporate.

Lay your potato peels on a rack and dry thoroughly in a warm oven.

The potato skins, on a rack for drying out
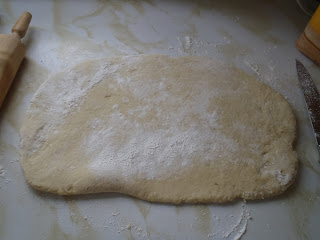
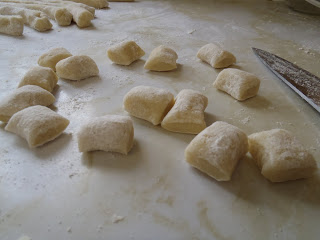
Once the potatoes have cooled, add flour and mix until a dough forms. To shape the dumplings, roll the dough flat, cut into strips, then cut the strips into rectangular pillows.


The dough
The dough, rolled flat
The dough, cut into strips
The dough, cut into pillows
Now the broth. Make a simple vegetable broth by sweating onions, carrots, celery, and a touch(!) of tomato for colour and acidity. Add parsley, bay, and pepper. Cover with cold water and simmer for about an hour. Strain out the vegetables.

Add the crisp potato peels to the vegetable broth and simmer until you can taste the potato and the broth has reduced to a flavoursome concentration. Remove the peels before serving.

The finished soup