Friday, December 16, 2011

Irish Cream

Cream, rich as an Irish brogue;
Coffee, strong as a friendly hand;
Sugar, sweet as the tongue of a rogue;
Whiskey, smooth as the wit of the land.

-a traditional toast accompanying Irish coffee


There are two drinks that we go through in unholy quantities this time of year.  The first without question is rum, as it is used in all kinds of preserves, baking, and cocktails.  The second is Irish cream, consumed on its own, or diluted with a bit of milk or coffee.

For years my standby has been Bailey's, but this year I decided to make my own.

Irish cream is comprised of cream, sugar, and Irish whiskey, usually but not always flavoured with coffee.  It is around 20% alcohol by volume, and has a rich, viscous mouthfeel.  It is basically an Irish coffee (whiskey, sugar, and cream stirred into a cup of coffee) with the ingredients in different proportions.

If you plan on consuming Irish cream in coffee, there's probably not much point in flavouring it with coffee.  I'm after a drink to be enjoyed on its own, so I've included strong coffee in my recipe.

I've come across some recipes online that use condensed milk to approximate the thickness of commercial brands.  The truth is that it's not the thickness of condensed milk that gives the final drink a rich mouthfeel, it's the sugar content.  Sugary liquids have a high specific gravity and give the impression of viscosity on the palate.  Granulated sugar and cream therefore work just as well as condensed milk.

The following recipe is a reasonable facsimile of commercial brands, though with a more distinct coffee flavour.  Obviously you can adjust the whiskey content to suit your taste.


Irish Cream
a working recipe

Ingredients
  • 4 egg yolks
  • 50 g granulated sugar
  • 1 pinch kosher salt
  • 70 mL strong, high quality coffee, chilled
  • 33 mL heavy cream
  • 140 mL Irish whiskey, preferreably Jameson's
  • 1.25 mL vanilla extract
Procedure
  1. Whisk the sugar and salt into the egg yolks.
  2. Whisk in the remaining ingredients.  Let stand in the fridge overnight.

Yard of Flannel (a het pint...)

Yard of flannel is hot ale, laced with rum and spices, and thickened with egg.

Though there's a surprising number of beer and cocktail blogs that have tried out old recipes of yard of flannel, there's very little information on the history of this drink available online.

I've found no documented link between these two drinks, but yard of flannel is nearly identical in recipe and preparation to an old Scots cocktail called het pint (literally "hot pint").  The only difference is that the Scots version typically uses whiskey instead of rum.

Het pint was once an important part of Scottish celebrations, especially Hogmanay, the Scots New Year.  In the 17th and 18th centuries, public houses made het pint on New Year's eve, and villagers would buy a copper-kettle's-worth to take home for the festivities.

Kettles of het pint would also be carried through the streets by "first-footers."  The first person to enter a house on New Year's day was said to be a foretoken of the prosperity of the coming year.  The first-foot was ideally "a man, tall with dark hair... carrying gifts, including whisky, tea, coal, or salt, symbols of good health, good fortune, good luck, a warm home, and a full larder."[1]  In some traditions the first person to cross the threshold is a more or less random event.  In others young men would travel from house to house with gifts.  These first-footers often carred pots of het pint with them as they walked through the town, offering the drink to passers-by.

Het pint was consumed at many other celebrations, notably rural weddings on Orkney.[2]

Not only are recipes for het pint and yard of flannel consistenty nearly identical, they both use the same technique to develop a tall foamy head on the drink.  When agitated, the egg proteins develop a head that is much more stable than that of beer alone (think: meringue).  The head on het pint and yard of flannel is traditionally produced by pouring the drink back and forth between two mugs in a tall cascade.

Ale makes up the bulk of the drink, so the choice of ale to be used is the most important decision made by the cook.  Nowadays "ale" refers to a beverage that undergoes a warm fermentation with a top-fermenting strain of yeast, typically producing an aromatic, fruity, floral beer.  It's counterpart, "lager," goes through a colder, longer fermentation with a bottom-fermenting strain of yeast, resulting in a cleaner, crisper drink.

Until atleast the nineteenth century, in Great Britain the word "beer" referred exclusively to hopped beers (a Bavarian invention), while "ale" was reserved for the traditional, unhopped, British drink.  Therefore the "ale" called for in old het pint recipes refers to this ancient style of British beer.  Many contemporary beers made in the UK are reminiscent of these older styles, though they do contain some hops.  Here's a description of modern Scottish ale:

Scottish Ales traditionally go through a long boil in the kettle for a caramelization of the wort. This produces a deep copper to brown... brew and a higher level of unfermentable sugars which create a rich mouthfeel and malty flavors and aromas. Overall hop character is low, light floral or herbal, allowing its signature malt profile to be the highlight.[3]

This style of beer makes perfect sense for het pint, as the malt and caramel flavours compliment the rum or whisky.  The pronounced hops flavour of most contemporary beers would probably be out of place.

I've hear that the "yard" in yard of flannel refers to the yard-long glasses in which the drink was once served, and the "flannel" refers to the rich, soft mouthfeel developed by the heated eggs.  I can't find a reliable source for that information.

I don't imagine this drink will be everyone's cup of tea, as the modern man doesn't like the thought of drinking hot eggs, but I have to say it's a well-balanced cocktail with a fantastic mouthfeel.


Yard of Flannel (a het pint...)
adapted from Back to Basics

Ingredients
  • 1 large egg
  • 1/6 cup dark brown sugar
  • 1 pinch of salt
  • fresh grated nutmeg to taste
  • 341 mL your favourite English pale ale, Scottish ale, or possibly brown ale
  • 1/6 cup golden rum
Procedure
  1. Whisk together egg, sugar, and salt.
  2. Gently heat ale and nutmeg in a heavy-bottomed pot.  Do not let the ale boil.
  3. Once the ale mixture is starting to steam, slowly pour it into the egg while whisking.  Adding the ale too quickly may curdle the egg, which would be bad.
  4. If you're a stickler for tradition, you can develop the head by pouring the mixture back and forth between two mugs.  As you can probably imagine, this quickly cools down the drink.  You can get just as good a head by whisking vigorously while the flannel is still in the bowl.

1. Duncan, Dorothy. Feasting and Fasting: Canada's Heritage Celebrations. ©2010 Dorothy Duncan. Dundurn Press, Toronto, ON. Page 313.
2.  McNeill, F. Marian.  The Scots Kitchen.  ©2010 The Estate of F. Marian McNeill.  Birlinn Ltd, Edinburgh, Scotland.  Page 309.
3.  Beer Advocate.com

Thursday, December 15, 2011

Towards a Theory of Eggnog

 
For the last two years I've been using this method to make eggnog:
  • whisk egg yolks with some sugar until pale and foamy
  • whisk egg whites with some sugar until soft peaks form
  • fold the two egg foams together and stir into milk and cream
  • add rum and nutmeg
The problem with this method, first of all, is that if it sits for even five minutes, the eggy foams separate from the milk and cream. I wouldn't mind a bit of head on the nog, but the foams make up about 90% of the volume.  Even during the brief moments in which all the ingredients are properly incorporated, the light and airy texture of the nog doesn't seem appropriately robust and nourishing.

So I've done some experimenting with my nog method.  First I tried simply whisking all the ingredients together, by-passing the egg separation and foaming.  This version also separated, which absolutely baffles me, as whisked eggs don't separate if you leave them in the fridge.

Out of sheer curiosity I tried cooking out a mixture of milk, cream, and yolks, à la crème anglaise.  It was a bit thick, even once thinned with rum, but before repeating the process with a lower yolk content I decided that the cooked-egg taste is also inappropriate to the ideal nog.

For now I've settled on using just yolks.  Somehow this isn't as satisfying a concept as drinking whole eggs, but it's tasty.


Eggnog: A Working Recipe

Ingredients
  • 4 oz egg yolks
  • 8 oz granulated sugar
  • 1 pinch kosher salt
  • 16 fl oz whole milk
  • 4 fl oz heavy cream
  • 16 fl oz golden rum, I use Appleton's
  • nutmeg to taste
Procedure
  1. Whisk sugar and salt into egg yolks.
  2. Add all remaining ingredients and whisk to combine.

The final important piece of information I came across this year was that properly boozed nog can be made well, well before consumption, and aged in the fridge.  Michael Ruhlman has successfully aged eggnog for two years, if you can believe it.

I put up a large jar of eggnog on the first of December, with the intention of cracking it open on the solstice or Christmas.  It lasted maybe fours days in the fridge.  A replacement batch is currently ripening on the bottom shelf.

Sunday, December 4, 2011

Wild Rice and Barley Pudding

A variation on a Christmas classic, using some local pantry items.

I had some cooked barley in my fridge, remnants of a barley-broth.  I decided to employ the rice pudding method to save the left-overs.  (Rice Pudding Method: a lengthy secondary cooking in sugar and milk.)  The barley sucks up a lot of the milk and releases some starch into the pot.

Once a porridge has formed, cooked wild rice and dried cherries are added, and the whole lot is thickened with butter, egg yolk, and a touch of cream.

Since the wild rice and cherries are added at the end, they stay firm for textural contrast.

Wild Rice Broth: A Weird Digression

Have you ever noticed that the water you just cooked wild rice in is aromatic and flavourful and has a fantastic colour and is relatively clear?

It is.

So much so that I've started saving my wild rice broth, usually to be subtly incorporated into the same dish as the rice.  I might, for instance, reheat the rice in a bit of its own broth.

But, if you reduce the strained broth and infuse it with a bit of garlic and celery...

...I think it's good enough to be consumed as a first course.

That's weird.  I'm sorry.

Let's get back to the pudding.


Wild Rice and Barley Pudding
 
Ingredients
  • 235 g cooked pearled barley
  • 300 g whole milk
  • 30 g dark brown sugar
  • 1 pinch kosher salt
  • 1/2 stick of cinnamon
  • 50 g cooked wild rice
  • 20 g dried sour cherries
  • 30 mL brandy
  • 1 egg yolk with absolutely all remnants of white removed
  • 20 g butter
  • 30 g heavy cream
Procedure
  1. Soak the dried cherries in the brandy.
  2. Put barley in a heavy-bottomed pot and cover with milk, brown sugar, and cinnamon.  Stir to combine.  Bring to the boil then simmer until most of the milk has boiled off or been absorbed, about 40 minutes.
  3. Strain the cherries from the brandy.  Reserve the brandy.  Add the cherries and wild rice to the barley.  Remove the cinnamon stick.
  4. Return to a simmer.
  5. Remove the pot from the heat.  Stir in the butter, then the egg yolk.  Adjust the consistency of the pudding with the heavy cream.  Serve immediately, accompanied by a taste of the cherry-brandy.
Makes 3-4 servings.


Saturday, December 3, 2011

Bread Pudding as God Intended It

When I say, "As God Intended," I mean using actual, stale, left-over bread heels.  Buying fresh bread just to tear it up and dry it out is like using striploin to make sausage. Or rolling a torchon of foie gras just to melt it into cooking fat.


Soaked in milk and cream, mixed with eggs, sugar, and rum-soaked raisins, pressed into a casserole and baked:


The classic accompanying rum sauce: two parts icing sugar, one part butter, gently cooked to remove the starchy taste of the sugar.  Finished with a bit of egg and a lot of rum.

Once the pudding has been drenched in the rum sauce, I like broiling the dish until there are a few burnt patches.  This is a trick I picked up at Jack's.  The charred bitterness sets off the sweetness nicely.

Mincemeat 2011

I might be in love with the idea of mincemeat more than the dish itself. It's an absolutely medieval combination of flavours: dried fruit, spices, liquour, and suet.

Last year I tried Alton Brown's recipe.  It was good, though not what I was expecting. His pie is fruity, tart, and sweet.  The texture was unique: the dried fruit partially reconstitutes during baking, making for an interesting chew.

This year I made some changes:
  • I added meat to my mince.  Most recipes, including Brown's, contain only suet, but I know that my grandmother's also had beef chuck.  I heavily browned the meat before adding it to the other ingredients to develop flavour texture.
  • I used lamb suet and shoulder, instead of beef.  I happen to have lots of lamb right now.
  • I processed the mixture for a finer, more consistent texture
  • I plan on adding bread crumbs to the mincemeat before I bake it in a pie shell.  Last year the liquor and fruit juices and rendered suet bubbled over the crust.  I think that the bread crumbs will help keep that moisture in the pie.
This mincemeat will age in my fridge until the winter solstice.  I'll let you know how it turns out.


Mincemeat
2011's version, grafting my grandmother's recipe to Alton Brown's, and using lamb instead of beef

Ingredients
  • 2 tart apples, peeled, cored, and quartered
  • 8 oz sultana raisins
  • 4 oz dried sour cherries
  • 4 oz dark brown sugar
  • 2 ounces lamb suet, coarsely chopped
  • 6 oz ground lamb shoulder
  • 1 orange, zested and juiced
  • 1 lemon, zested and juiced
  • 1/4 cup spiced rum
  • 1/2 tsp freshly grated nutmeg
  • 1/4 tsp freshly ground allspice
  • 1/4 tsp freshly ground clove
  • bread crumbs
Procedure
  1. Heavily brown the ground lamb in a hot, heavy-bottomed stainless steel pan.  The meat should be a deep amber on all surfaces.  Strain the meat to separate it from any rendered fat.  Chill thoroughly.
  2. Combine all ingredients except bread crumbs in a food processor.  Pulse until ingredients are well-combined and desired texture is achieved.  Pulsing 10 times will give a mincemeat with a coarse texture.  I prefer a finer, more homogeneous texture.
  3. Transfer to an airtight container and store in the fridge atleast 1 week before using.  Keeps for 6 months.
  4. Before adding to pastry, fold in breadcrumbs.

Friday, December 2, 2011

Fruitcake 2011

It's about to get all Christmasy up in here.

Here's a simple start to the Christmas posts on Button Soup.  Last year I wrote about the importance of fruitcake.  I'm fine-tuning my recipe year to year, and I thought I'd share the 2011 version.

This year I used our local evans cherries instead of the BC bings.  They were so soft after the glacé process I worried they would be too delicate to fold into the dense pound cake batter.  While they definietly don't hold their round shape like the bings, they managed to stay in one piece.  Their tartness is a welcomed addition to the cake.  There are some cursory instructions on making glacé cherries and candying peel in last year's fruitcake post.

Maybe next year I can use beaked hazelnuts from the river valley...


Fruitcake

Ingredients
  • 8 oz unsalted butter, cubed
  • 8 oz granulated sugar
  • 8 oz eggs
  • 8 oz all-purpose flour, sifted
  • 2 tsp kosher salt
  • 1 orange, zested and juiced
  • 5 oz roasted, skinned hazelnuts
  • 5 oz glacé evans cherries, strained from liquid
  • 5 oz candied orange peel
  • approximately 1 cup of fine, spiced rum
Procedure
  1. Preheat oven to 325°F.
  2. Thoroughly butter the base and sides of a ceramic terrine and line with parchment.
  3. Combine butter and sugar in the bowl of a stand mixer.  Cream with the paddle attachment until light and fluffy, about five minutes.  Start on a low speed, and once the sugar and butter have combined, turn to medium-high.
  4. With mixer still running, add the eggs one at a time, allowing each to be fully incorporated before adding the next.  Add the orange zest and juice.
  5. Turn the mixer to  the lowest speed.  Slowly add the flour.  Stop the mixer as soon as all the flour is incorporated into the batter.  Do not over-mix.
  6. Fold in the hazelnuts, cherries, and candied peel.
  7. Transfer the batter to the prepared terrine.  Bake in the 325°F oven until the top of the cake is domed and brown, and a toothpick inserted in the centre comes out clean, roughly 60 minutes.
  8. Remove the cake from terrine and cool on a wire rack.
  9. Once cooled.  Transfer the cake to a container with an airtight lid.
  10. Store the cake at a cool room temperature, about 15°C.  Every other day for 1 month sprinkle 1 tbsp of rum over the cake, getting the liquor on all the surfaces.  I affectionately refer to this as feeding the fruitcake.

Thursday, December 1, 2011

Tangle Ridge Ranch Lamb


If you're unfamiliar with Tangle Ridge Ranch and their pastured lambs, here's some information to digest:
Last week Tangle Ridge killed this year's lambs, and Lisa and I were fortunate enough to get a whole, uncut carcass.  My primary motivation was securing lamb meat and offal for this January's Burns supper (stay tuned...)  Here's some details on the purchase.


Cutting Lamb

Lamb is a relatively simple animal to butcher.  The carcass is easy to handle (typically 40-60 lbs) with fewer cuts than, say, a cow, or even a pig.  For details on cutting, here's a great video of a master butcher breaking down a whole lamb.

Lambs are cut into four primals.  First is the front, from which you get:
  • neck, or "scrag": one of the most repulsive words in the English language, but a fantastic piece of meat for braising
  • shoulder chops, roasts, or stewing meat
  • arm chops
  • foreshanks
Then the loin, which yields:
  • loin chops, analogous to the t-bone steak on a cow
  • racks, often prepared with the slender ribs still attached and thoroughly cleaned, at which point it's called a "Frenched" rack.  (Is their any other nationality that becomes a verb so easily?)
The belly section of the lamb is called the flank.  It's usually made into ground meat, but can also be braised or stewed.

Finally there's the legs, most often kept whole or nearly whole for large roasts.

It took me an hour to break down the lamb, including the time for the more tedious tasks like portioning the chops and Frenching the racks.


The Numbers

Compared to most other meats, lamb is expensive.  My side of pork this year was $2.15/lb for a 110 lb side.  This whole, uncut lamb was $5.85/lb for a 50 lb carcass.  The cut and wrapped lambs sell for $7.50/lb.

Yes, compared to pork this lamb is expensive.  But compared to supermarket lamb, Tangle Ridge is a steal.

I weighed every piece of meat that I got from my lamb to see what those final cuts would cost when purchased from retailers.  In the spreadsheet below, the weights are what I got from my animal.  The costs are for an identical cut, as sold at local retailers, mostly Sunterra Market in Lendrum, which carries a lot more lamb than most grocery stores.

There are a few cuts (flank, neck, and the "fatty trim" that I rendered out for cooking fat) that are not available in grocery stores.  These represent small portions of the carcass, and are estimated at very low prices, so are a correspondingly small source of error.


If I purchased all the cuts of lamb that are now in my freezer from a grocery store, it would have cost about $8.26/lb, instead of $5.85.

I can't wait to tuck into this lamb.  I'll be posting about some of the preparations over the next few months.

Wednesday, November 23, 2011

Coffee in Austria

I was surprised to learn that Austria has a strong, distinct coffee culture.  I probably shouldn't have been, as the adoption of exotic goods like cane sugar and coffee beans was the hallmark of European imperialists, and Austria, as the granddaddy of European imperial powers until the First World War, has been roasting, grinding, brewing, and drinking coffee for centuries.

The story of how coffee came to Austria was told to me several times during my stay.  In 1683, the Ottoman army, led by the Grand Vizier, besieged Vienna.  A Polish soldier named Jerzy dressed in Turkish garb and left the city to contact Duke Charles of Lorraine and ask for assistance.  Jerzy snuck back into the city, bringing a promise from the Duke.  With this information, the Viennese city council decided to resist the siege until reinforcements arrived.  The Turks were later defeated in the Battle of Vienna, and forced into a hasty retreat, during which they left behind several bags of coffee beans.  Jerzy is said to have been awarded, among other things, many of these bean sacks, with which he opened the first coffee house in Vienna.

Another version of the story has the Turkish beans discovered and brewed by a Capucin monk who, finding the drink too strong, dilutes it with milk, thus founding European coffee culture, and inventing what we, with most of the world (but not Austria!) call the capuccino.  That was the most complicated sentence I've ever written.

I have no idea if these stories have any historical merit, but the very fact that they are widely known and repeated speaks to the pride Austrians take in their coffee.  To further appreciate Austrian coffee culture, let's talk a bit about our own.

North Americans tend to distinguish between "normal coffee" and "espresso," sometimes erroneously pronounced "expresso."  Many think that these are two different types of beans.  They're not: they are two different methods for extracting the flavourful oils from a roasted, ground coffee bean.  The same beans are used in both methods.

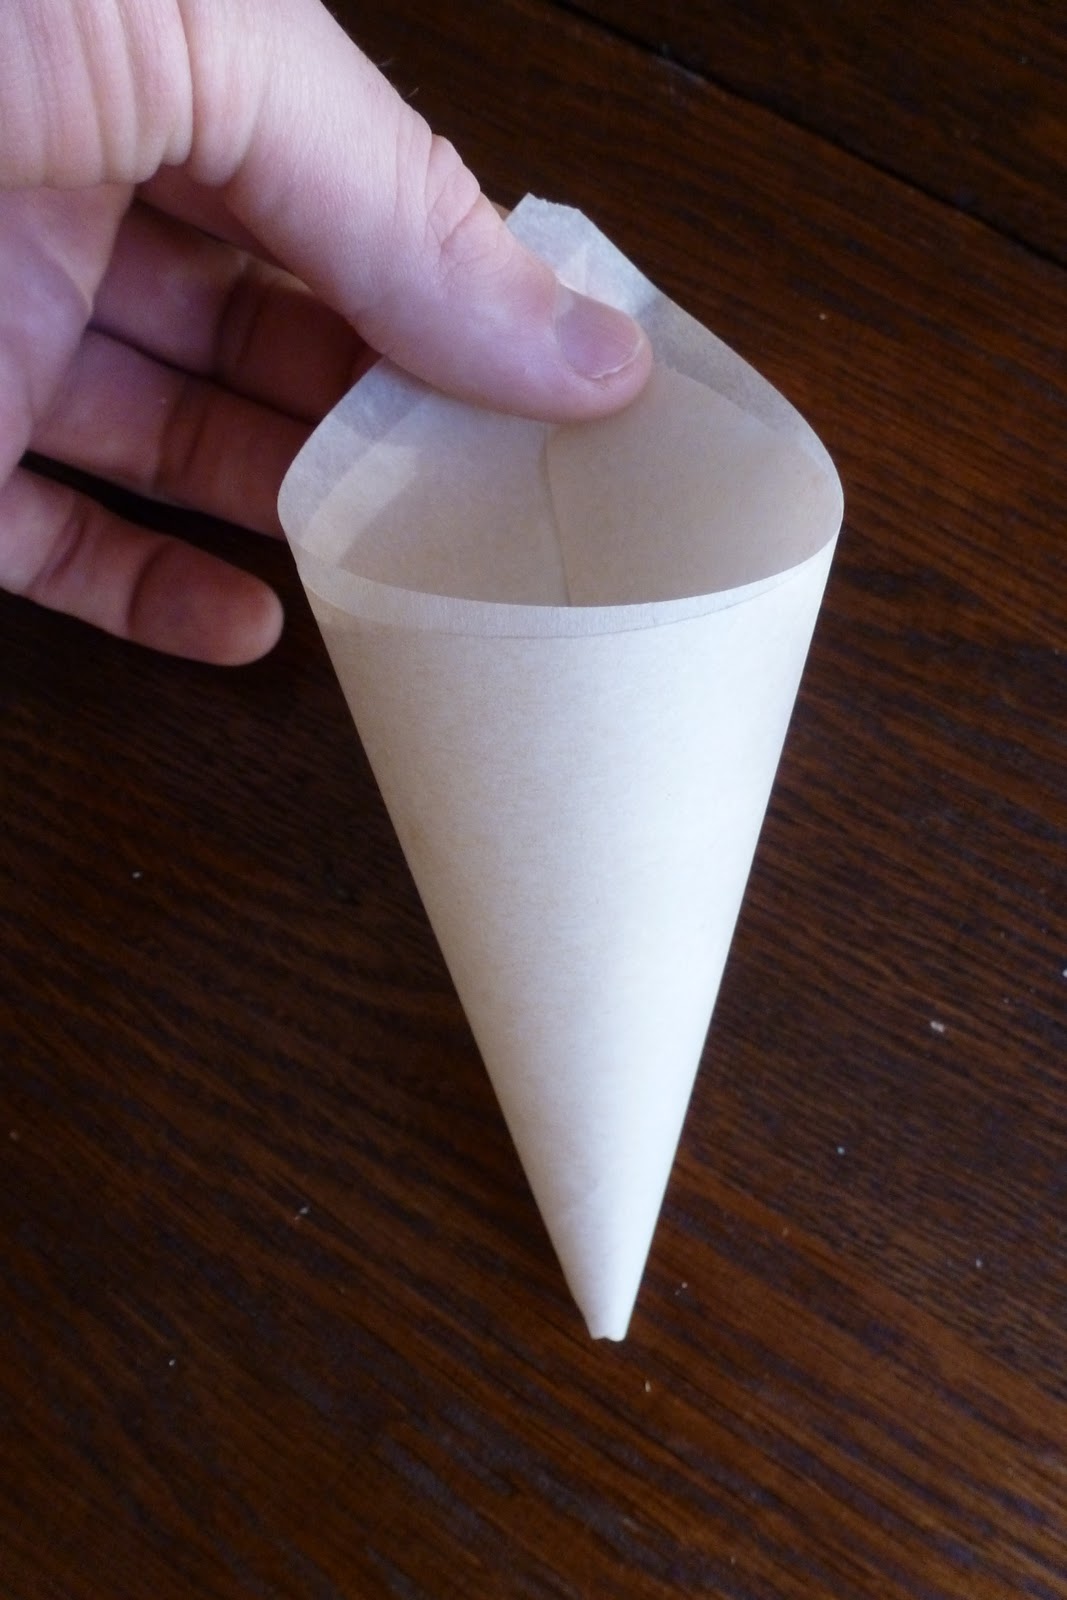
"Normal coffee," that is, the coffee brewed in most homes before the morning commute, is drip-brewed and filtered.  Hot water is slowly poured over ground coffee beans.  Under the force of gravity it seeps through the grounds, absorbing the flavour of the beans.  A paper filter ensures that none of the grounds get into the final cup.

"Espresso" is made by forcing hot water under pressure through compact coffee grounds.  This method of extraction produces a very different drink than drip-brewing, as it extracts and emulsifies components of the beans that are usually left behind.  It yields an extremely flavourful liquid that can have an almost viscous mouthfeel.  This method also produces a bit of foam on top of the drink, called crema.  (Here's an interesting article on the formation of crema.)

In many parts of Europe, including Italy and Austria, almost all coffee is "espresso-style" coffee.  In my experience, drip-brewed filtered coffee was only available at a few touristy rest stations and hotels.  The reason I keep puting "espresso" in "quotation marks" is because much of the world uses this style of brewing, but doesn't drink anything called an espresso.  It's a bit like calling braised meat "coq-au-vin-style" meat.

Anyways.  Food historians now refer to three waves in the marketing and consumption of coffee in North America.  The first wave was the establishment of large coffee importers like Folgers in the nineteenth century.  The second wave was started by small coffee houses that made espresso-style drinks and categorized much of their coffee by country of origin and roast. This movement culminated in the proliferation of franchises like Starbucks and Second Cup that popularized a style of coffee loosely based on the Italian caffe.  I say "loosely" because the language is largely Italian (grande, venti, espresso, capucino, latte, americano, macchiato, ad infinitum...) but many of the practices (like the irresponsible use of foamed milk) are not.

The third wave, still going strong, emphasizes coffee bean roasting, grinding, and brewing as an artisinal trade.  Roasters and vendors are developing ways to categorize and discuss coffee that is similar to wine.  They sell their brew with detailed aroma- and flavour-profiles.   Their coffee us usually presented simply, without the elaborate, sweet, foamy accompaniments associated with the second wave.  Even so, ordering in a third wave coffee house can be an alienating experience to the uninitiated.  (If you don't know what I mean by that, go to the Garneau Transcend and try ordering "a coffee.")  Third wave vendors promote fair trade, and often develop lasting, mutually beneficial relationships with coffee bean growers and their communities.

Coffee culture in Austria has been much more static over the past hundred and fifty years.  Most of the classic cafés in Vienna were established in the late nineteenth or early twentieth century.  They have a fixed style of brewing and serving.  Ordering "a coffee" in an these cafés is a bit like ordering "beef" in an American steakhouse.  Here are some of the common drinks:
  • Brauner - Black coffee, served with a small dish of milk to be stirred in.  At one time it was available as either a Grosser Brauner (bigger) or Kleiner Brauner (smaller), though the smaller version is now more or less extinct.
  • Verlängerter - (Literally, "lengthened,") A Brauner pressed with a little hot water.
  • Melange - (From the French, literally, "mixture") Coffee with steamed milk, and often whipped cream.
Coffee drinks containing liqueur:
  • Maria Theresia (a famous eighteenth century Habsburg) - coffee with orange liqueur and whipped cream.  I can't say for certain, but oranges might be associated with Maria because one of her residential palaces, Schönbrunn, in Vienna, is famous for its orange groves.
  • Fiaker - a Verlängerter with rum
  • Masagran - ice coffee with Maraschino cherry liqueur
The coffee is served on a silver tray with a glass of water, a small chocolate, and, if appropriate, a small pitcher of milk.


Friday, November 18, 2011

Pickle Soup

This is exactly the kind of delicious, hearty, ingenious, frugal dish I love.

While finely chopped condiments like relish, picalilli, and jam can be canned on their own, larger slices of vegetables like cucumbers, beets, and carrots require an acidic liquid in which to be preserved.  The liquid prevents the growth of aerobic pathogens by keeping air away from the vegetables and filling the space with acid, salt, and sugar.  Once the vegetables are gone, this delicious liquid can be used in a number of applications.

If this sounds at all gross to you, think about what is in dill pickle juice: water, garlic, black pepper, mustard seed, coriander, bay, cider vinegar, salt, and sugar.  The liquid has been cooked out and over the course of a few weeks or months has had time to mellow and balance.  It really is fantastic stuff.

My day to day use of pickling liquid is in dressings.  Thinning out mayonnaise with a bit of dill pickle juice makes a great dressing for slaw.  Thinning crème fraîche with pickled beet and horseradish liquid makes an elegant accompaniment for smoked fish.

I recently came across a traditional Ukrainian dish called kvasivka selians'ka that uses the brine from the sauerkraut crock:

[The soup] makes a thrify use of the sauerkraut juice that would otherwise be left in the barrel.  It seems appropraite for Pentecost celebrations, since by late spring the supply of last year's sauerkraut would probably have run low.[1]

It may only be November, but I've already gone through a few jars of preserves.  Today I had some dill pickles out, so I decided to make soup.

For this particular version, I browned carrots, onions, and the garlic cloves from the pickle jar in butter.  Then I added all-purpose flour and cooked the roux until aromatic and starting to brown.  Then I poured in some of the pickling liquid and whole milk, which I cooked gently until the mixture thickened.  At this point I added some boiled, chopped, russet potatoes, and some of the pickles themselves.

Some notes:
  • Consume very hot, with a healthy dose of black pepper, and a drizzle of cold-pressed canola.  I don't know why, but the flavour of cold-pressed canola goes extremely well with this soup.
  • The exact amount of pickling liquid you use will depend on how acidic the liquid is.
  • The starches (the roux and the potatoes) temper the acidity of the pickles.
  • Browning the onions and roux brings out their sweetness, which compliments the sweetness of the pickles.


1.  Pisetska Farley, Marta.  Festive Ukrainian Cooking.  ©1991 University of Toronto Press.  A very good read.

Friday, November 11, 2011

Ice Clarification of Stock

This time last year I started thinking about preparations that take advantage of the frigid outdoor temperatures.  I made candy in the fresh snow and tried the "apple jack" method of concentrating alcohol by freezing.  I've just tried another sub-zero preparation, gleaned from the pages of The Fat Duck Cook Book.  It's a fascinating technique called gelatin-clarification of stock.

In culinary school one of the cool-but-antiquated dishes you learn to make is consommé.  Consommé is flavourful stock that is strikingly, brilliantly clear.

The classical method for clarifying stock uses something called clear meat.  Clear meat contains albumen-rich ingredients like egg whites and certain cuts of meat like shank.  When albumen coagulates, it forms a delicate network that traps the tiny particles that cloud stock.  Unfortunately, in doing this it also removes a lot of the flavour of the stock, so we need to add taste-fortifying ingredients to the clear meat.  The shank-meat will accomplish this to a certain extent, but we also add vegetables.

Once the clear meat is assembled it is added to the cold stock.  The pot is placed over low heat, gently stirred and very gradually brought to a simmer.  As the stock heats up, the eggs and meat start to cook, and the albumen network moves through the stock collecting impurities.  Once the eggs and meat are completely cooked, they form a thick mat on the surface of the stock, called the raft.  To release the pressure created by the simmering stock below, the raft should have a hole poked into it.  The stock-and-raft is simmered gently for about an hour, to extract the flavour of the meat and vegetables

Heston Blumenthal's technique for clarifying stock is completely different and absolutely foolproof, though it takes a while longer than the classical method.

Here's the theory behind his method.  A properly made stock will be rich in gelatin.  When chilled, gelatin forms a network similar to that of the coagulated albumen in cooked meat and eggs.

For a stock with a typical gelatin concentration, the network forms at any temperature below roughly 10°C.  If the stock is heated above this, the network melts.

Imagine freezing a stock to -18°C.  The gelatin sets up its network, and the water freezes.  Now imagine putting that frozen stock in a 4°C fridge.  The water content will melt, but the gelatin network will stay in tact.  As the water melts it will run through the gelatin network, which acts like a filter and catches the particles that cloud the stock.  Once all the water has melted you are left with a cloudy clump of gelatin, and a pool of crystal-clear stock.

To really test the clarifying-power of this technique, I made the an extra-cloudy pheasant stock by cooking bones and mirepoix at a rolling boil instead of a simmer.  Then I put the stock in a stainless steel bowl, covered it with plastic wrap, and set it outside overnight.  It froze into a solid hemisphere.


To remove the ice, I inverted the bowl and heated the underside with a blowtorch.  Once the curved surface of the hemisphere had melted slightly, the ice slid out of the bowl.  I rested that ice in a colander lined with a clean dish towel, then set the whole contraption in a large glass bowl in the fridge.


It takes quite a while for ice to melt in the fridge.  Mine took about 2 days.  Freezing the stock in a large, thin sheet would accelerate melting.

The results are surreal.  This is far and away the most dazzling stock I've ever seen.  In the photo below you can see how murky the original stock was.


There are two problems with this method, both stemming from the fact that you have removed all the gelatin from the stock.  First, the consommé has a very watery mouthfeel.  To restore the rich texture the diner expects from clarified stock, Blumenthal typically back-adds pure gelatin.

Second, the process has a very low yield.  The classical method also results in waste, but not to this extent.  I think that my yield was particularly low because of the muddiness of my original stock.  I started with 545 g of pheasant stock, and ended with 305 g of crystal consommé, a yield of only 56%.

Obviously this is not a process I will do very often.  Like, possibly never again.  If you take the time to make a stock properly, it will be clear enough to serve as a soup to all but the most pretentious guests.

Still.  An interesting experiment.

Thursday, November 10, 2011

Pheasant Pot Pie

Last November we started getting game birds, chiefly grouse and pheasant, from Mr. McLarney, who hunts them with his English pointer.  In exchange for the wild poultry, I provide Mrs. McLarney with a recipe for their preparation.

Cooking grouse and pheasant is fairly new to me, and I'm still figuring out the whole hanging-plucking-gutting-cooking thing.

From the cook's perspective, the ideal game bird (or rabbit) is shot cleanly in the head.  That way there's no shot hidden in the meat.  You get a higher yield, and diners won't unwittingly bite down on a piece of lead.  I have very little experience with guns, but apparently getting that head shot is relatively easy when the slow-witted bird is standing on the ground.  Mr. McLarney's birds are flushed from the grass and shot in flight, which makes it next to impossible to get a clean headshot.  The hard fall to the ground often breaks some of the bones and causes bleeding.  The damaged flesh has to be cut away before cooking.

I'm very interested in hanging the birds, which is supposed to make the meat more tender and flavourful, but the gunshot wounds and bruises that result from the flushing-method make me hesitant.

My bewilderment continues once the birds are in my kitchen.  Purists insist on dry-plucking game birds in order to preserve the skin, which is considered a gastonomic delight.  I've tried this a couple times now, and have found the skin of both grouse and pheasant to be inedibly rubbery.

As far as cooking, most sources, including Charlie Trotter's book Meat and Game, say that the birds can be roasted to just-doneness and yield moist, tender flesh.  I haven't had any luck with dry-heat methods.  My birds have all required a bit of stewing or braising, though maybe only 45 to 60 minutes.

In that vein, the most successful dish this year was pheasant pot pie.  Fergus Henderson has popularized the combination of pheasant and pig trotter.  The gelatin produced by cooking out the trotter goes a long way to masking any dryness in the pheasant.  In the recipe below, the procedure is adapted from Henderson.


Pheasant Pot Pie


Ingredients
  • 1 pig trotter
  • 1 L stock, either pheasant, chicken, or pork
  • 1 pheasant, skinned and jointed
  • 1/2 white onion, small dice
  • 1 carrot, peeled, small dice
  • 1 rib celery, small dice
  • 1 clove garlic, minced
  • 1/2 cup dry apple cider
  • 1/2 cup cooked wild rice
  • 3 sprigs thyme
  • 1 small bundle sage
  • 3 tbsp butter
  • 3 tbsp flour
  • 1/2 cup heavy cream
  • 12 oz of your favourite flaky pie dough
Procedure

For the filling:
  1. Season the trotter and pheasant pieces with salt and pepper.  In a braising pot, sear the meat over high heat until thoroughly browned.  Remove from the pot and reserve.  Lower the heat to medium-low.
  2. In the same pot, sweat the onion, carrot, celery, and garlic until translucent.  Do not brown the vegetables.  Remove from the pot and reserve.
  3. Deglaze the pot with the apple cider and reduce the liquid by 3/4.  Add the stock and bring to a boil.  Add the trotter and simmer until very tender, about 2 hours.
  4. Add the jointed, browned pheasant to the pot.  Return the stock to a boil and simmer until the pheasant is cooked through, roughly 15 minutes.  Remove the trotter and pheasant from the pot.
  5. Add the cooked vegetables to the pot and simmer gently for 30 minutes.  In the mean time, pull the meat from the trotter and pheasant (be sure that there are not bones left in the meat!)  Pull or chop the meat into large pieces.
  6. Add the herbs to the pot.  Simmer for 15 minutes, then remove the herbs and discard.  Add the chopped meat and wild rice to the pot.
  7. In a separate pan, melt the butter.  Once it is foaming, add the flour.  Cook, stirring occasionally, until the flour is just starting to colour and becomes very aromatic, about 10 minutes.  This is the roux.
  8. Stir the roux into the other ingredients.  Bring the liquid to a simmer and cook until the mixture thickens.  Add the cream.  Adjust the seasoning with salt and pepper.
  9. At this point the filling can be chilled and kept in the fridge for a few days.
To serve:
  1. Spoon the filling into an oven-proof ceramic dish.  This can be one casserole, or several individual ramekins.  Roll out the pie dough to 1/8" thickness.  Press the pie dough over the filling.  Cut a few holes in the dough to vent the filling.  Bake at 425°F for 15 minutes, then at 350°F until the crust is golden to amber, about another 40 minutes.
  2. Let the pie rest for 10 minutes before serving.

Monday, October 31, 2011

Eating a Jack-o-Lantern

Two ways I eat my jack-o-lantern.

First, when hollowing out the pumpkin, I save the seeds.  A nifty trick for separating the seeds from the stringy pumpkin guts: throw the whole mess in a large pot of water.  If you rub the mass between your hands, you loose the pumpkin flesh from the seeds, which float to the top and can be easily skimmed off.  Dry them on a bake sheet lined with paper towel overnight, then toss with oil and seasoning and roast until golden brown.

Second, in years past, after the trick-or-treaters have stopped calling, I've taken my jack-o-lantern off the step, cut it in half, and roasted it in the oven.  Eating quality of carving pumpkins seems to vary, but most of the time the flesh tastes good, and can be puréed and converted to pumpkin soup or pie.

Sunday, October 30, 2011

Back Bacon

In the States this preparation is called Canadian bacon, but we usually call it back bacon.  It's more or less the same process as regular bacon, only done to a section of the loin instead of the belly.  There's an old style of back bacon from eastern Ontario called peameal bacon, in which a cured section of loin is rolled in peameal (crushed split-peas) before being smoked.  Peameal bacon is still made down east, though nowadays cornmeal is used.

Back bacon is usually made from the eye of loin: the large, round muscle often made into centre-cut pork chops.  You can also use the rib- and sirloin-ends of the loin, which have more fat and flavour than the centre.  I tried the classical eye of loin.

First the loin must be cleaned.  There is a band of meat and fat called the chain (in the top right corner of the picture below) that must be cut out, but can be reserved for ground meat.  There is also some fat and silverskin (top left) that can be removed and discarded.  I cut my cleaned loin into three sections so that it could fit in my curing bucket.


The main procedural difference between back bacon and belly bacon is that back bacon is usually brined instead of dry-cured.  My brine consisted of salt, curing salt, brown sugar, herbs, and a halved, squeezed lemon.  I used a ceramic plate to keep the meat submerged.


After sitting in the brine for a few days, the eye of loin is tied so that it will have a round cross-section.  In the picture below you can see three different colours on the meat: there are brown parts, pink parts, and a light grey part.  The cure, having lots of brown sugar, is responsible for the brown areas.  The pink sections are where the loin sections were either pressed against each other, or resting on the botton of the container.  The grey circle on the bottom is actually a piece of meat that was cooked by the acidity of the halved lemon.

When curing with dry rubs, you have to "overhaul" the meat: rub it down every couple of days to redistribute the cure.  I guess the same should have been done for this brine.  At the very least the loin sections should have been rotated so that the surfaces got even exposure to the brine.  This is mainly an aesthetic issue, as the meat seems to have cured properly.


Next the loin is hot-smoked to an internal temperature of 65°C.  This is the most critical part of the procedure.  Since the eye of loin is an extremely lean cut, over-cooking will produce dry meat.


Here is the final product.  The curing salt in the brine has given the meat a rosy colour. 


The most important thing to remember when eating back bacon: it's not belly bacon.  It's not the fatty slab of crazy pleasure that you might be used to.  That being said, back bacon still has its place.  If it's brined and cooked properly it is by no means dry.  The smoke and herbs balance the piquancy of the curing salt.

Friday, October 28, 2011

Bath Chaps, Revisited

The first course of Button Soup's February Pork Dinner was cold-cut Bath chaps: a boned-out pig's head, cured, rolled around the tongue, tied, poached, and sliced.   While I was extremely happy with the look of those Bath chaps, they were pretty bland.  I figure that the cure leached into the poaching liquid.

I had another go at the chaps with this fall's pig.  This time, instead of using a whole head, I used only one jowl, cured, and wrapped around the tongue.

After rolling and tying, I seared the meat over high heat.  Once chilled, I vacuum-packed the chaps and simmered them for two or three hours.  This was not proper sous-vide: though the meat was vacuum-packed, it wasn't cooked in a low-heat, temperature-controlled bath.  A good hunk of fat rendered from the chaps, and some insanely flavourful jus leached out.  The plastic seal definitely helped the meat retain its cure.  The final plate was very flavourful, strong of garlic and herbs and brown sugar and salt.

I think that the vacuum-packing also helped bind the tongue and jowl together.

Obviously the presentation of these chaps isn't as striking as that of the whole-head chaps.  If I try tongue-and-cheek chaps again I'll trim the jowl to a uniform thickness.  You can see that the left side of the chaps, below, is thicker.  Trimming that down would give a more balanced presentation, and maybe even let the jowl wrap all the way around the tongue.

Wednesday, October 26, 2011

Scrunchions


These are scrunchions.  They're a bit like pork rinds.

"Pork rind" simply means pork skin.  It can refer to the fresh, raw skin cut from a side of pork, but more commonly it means pig skin that has been rendered and fried crisp.  It is actually the same as crackling, though commercially-produced pork rinds are much more delicate than the crackling that develops on oven-roasted pork.

Scrunchions are made by a similar process, but they're made of raw pork fat, not skin.  I can't figure out how frying pure back fat results in a crisp product, but it does.  Scrunchions are one of the finer components of Newfie cuisine, along with chow-chow, screech, and saltfish.

Like so many kitchen preparations, the snack pictured above was a happy accident.  I had not planned on making scrunchions that day.  Rather, I was cooking a large rib roast.  My haggard butchery had left a slender flap of back fat hanging off the roast in the dry heat of the oven.  Part way through the roasting I realized that this flap had crisped into a scrunchion, so I cut a number of slices of fat from the roast and left them on the wire rack beside the meat.

Once crisp the scrunchions were removed to a paper towel and sprinkled with sea salt and chopped thyme.


How to Make a Paper Cone for Scrunchions

This is also how pastry cooks make impromptu piping bags from parchment paper.

Cut a 8" x 8" square of parchment paper.  Cut the square into two right angled triangles.  Orient one of the triangles so that the hypotenuse is towards you, like so:


Roll the bottom left corner so that its tip meets the tip on the top centre:


Now roll the bottom right corner around the cone, so that its tip meets the other two.


You should be able to pinch all three corners:


Fold the three corners down.  Fold them once more to secure the cone.


The cone should now hold its own shape, without the use of tape.

Monday, October 24, 2011

October Kills its Pig

Everybody rejoices when November kills its pig.
-an inscription on the Münster Cathedral


Edmonton gets cold enough to butcher outdoors a bit sooner than Westphalia, so our version of the inscription would have October killing the hog.

This year Lisa and I bought a side of pork from Nature's Green Acres.  I cut up our meat at Kevin's, on what he and his family call Pig Day.  While the majority of the pork was wrapped and frozen, there was also some curing, smoking, and grinding, processes that have come to typify the season.


Brine-Curing

Processing a side of pork is made less daunting by the presence of a brine bucket.  Certain pieces can go straight from the cutting board to the brine, making for less wrapping, labelling, and freezer management.

There are two types of brines. The first contains only table salt and other flavours like brown sugar and herbs. Salt is absorbed into the meat so that it is seasoned throughout its mass, and not just on the outside. The meat will retain more moisture during cooking. I call this a "seasoning brine."  This is a relatively quick process: I might brine a thick pork chop for four hours before cooking it.

If sodium nitrite is added to the brine, some additional, complex chemical changes occur. The meat develops a vibrant pink colour and a piquant flavour. I call this a "curing brine," to contrast it with the seasoning brine explained above. The curing brine takes longer than the seasoning brine.

Seasoning brines are typically made the day that you cook the meat. Curing brines can be started the day that the pig is fabricated.  Cuts that are typically brine-cured include hocks, hams, eye of loin (Canadian bacon), and the tongue.


Dry-Curing

Other cuts are better cured in a dry rub.  This is especially true of fatty pieces like the jowl and the belly.  These cuts get mixed with the dry cure (salt, curing salt, sugar, herbs), then bagged and left in the fridge for a week, after which they are rinsed and either air-dried or hot-smoked.


Grinding Meat and Making Sausages

When I first started cutting my pig, I assumed that all the trim would supply ample meat and fat for grinding. This may be true of professional butcher shops that produce portion-controlled chops with clean bones, but when the pig is separated mostly into large roasts, there is actually very little trim.  A portion of the shoulder must be specially reserved for ground meat.  I shoot for a 3:1 ratio of meat to fat.

I store my ground meat in three forms. First there are one pound bags of ground pork, unseasoned, ready to be made into patties or pie filling.  I also find it handy to freeze some loose ground pork that has already been seasoned and spiced.  Finally there are sausages.


Making Stock

Even with many of the bones staying in roasts (the hocks, trotters, rib roast, hams...), there are still plenty left to make stock.  Sections of the backbone, as well as the riblets, skull, tailbone, shoulder blade, and arm bone are lightly smoked on the barbecue, thrown in a pot, covered with cold water, brought to a boil, then simmered for twenty four hours.  The next day I add the vegetables and simmer for an hour, then the herbs, which are simmered for fifteen minutes.

Finally the stock is strained and cooled, then frozen into ice cube trays so that it can be used a little at a time.


Rendering Fat to make Lard

We keep a lot of fat on the roasts and steaks, so we set aside a section of back fat especially for rendering.  There is also the leaf lard, the brittle fat around the kidneys, analogous to the suet in sheep and cows.  All the fat is thrown in a heavy stainless steel pot with bit of water and put over very, very low heat.  The water helps distribute the heat in the early stage of the rendering.  Eventually the water evaporates, but by that time enough fat has melted to serve the same function.  I typically leave my fat on the stove overnight.