Sunday, September 25, 2011

Harvest Day at Tipi Creek 2011

September 24 was the last harvest day at Tipi Creek CSA for 2011.  We look forward to this every year.  Our Thanksgiving dinner is planned largely around what we take home that day.

Of the three years we have been members of the Tipi Creek CSA, this was the least productive.  You'll remember that May through July was cold, wet, and dreary.  While this was mitigated to some extent by the sheer variety of vegetables grown, overall we ended up with a lot less produce than in previous years.  That being said, with August and September being hot and sunny, we still had a fantastic final harvest day.

Here's more information on Tipi Creek:
Below are some photos from the harvest day.  Thank you, Ron and Yolande, for filling our larder with fantastic vegetables.  Can't wait for next year.


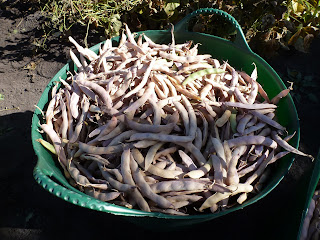
Dry Cherokee Beans

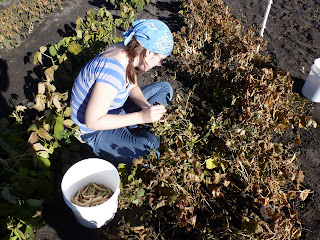
Picking the Cherokee beans

A basket of dried Cherokee beans


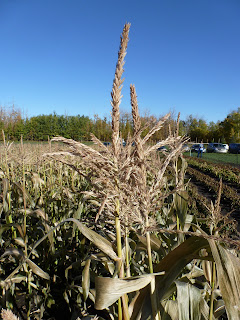
Corn

Corn tassles

A brimming bag of corn cobs

Lisa enjoys an ear of corn straight from the stalk


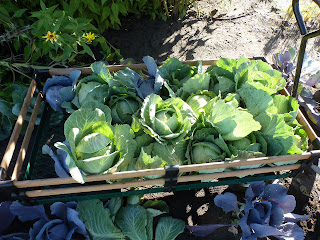
Cabbage (my favourite...)

A wagon of cabbage heads

 A truck load of cabbage heads


Cabbage's Half-Brother, Kohlrahbi 


Beet's Half-Brother, Chard


Greens


The Pumpkin Patch


Tuesday, September 20, 2011

Button Soup Canning Bee


Until recently the only bees I knew of were honey bees, spelling bees, and quilting bees.  There was a time when there were many other types of bees.  Canning bees, for instance.

A "bee" is any gathering with a task in mind.  In the days of yore it was often implied that people were coming together to help one person or family accomplish a large task in a relatively short amount of time.  In rural Canada a community might gather to help a family thresh all their grain.  Another threshing bee might be held the following week at a different farm.

A family history book tells me that food and whiskey were provided to those who helped.  That same family history cautioned not to serve the whiskey until the chores are done.


The Button Soup Canning Bee

After a summer hiatus for my trip to Austria, the Button Soup Supper Club returned in September.  A group of ten friends helped me put up a large amount of preserves, and were then treated to a large spread for dinner.

Preserves included dill pickles, pickled onions, onion marmelade, beet relish, figgy mustard, highbush cranberry sauce, pickled garlic (cloves and scapes), and piccalilli.  For those unaware, "piccalilli," at left, is just relish, made with a wide assortment of vegetables instead of just cucumber. My mother's family always made it with green tomatoes.   This particular batch used overgrown zucchini, bell peppers, and onions.


 Preserving Mountain Ash (Don't...)

Besides the more familiar preserves listed above, we also made some experimental batches of mountain ash jelly. A botanist friend has ensured me, time and time again, that our mountain ash are edible. I've finally conceded that they may be safe to eat, but they aren't worth eating.

I hate to say that, because we had people cleaning and processing mountain ash all day, but the fact is that the berries are just too soapy and bitter.  We even tried a traditional Scottish recipe for rowan jelly in which the whole, uncrushed berries are gently simmered, supposedly to minimize the extraction of soapy flavours, but the resulting liquid was still inedible.


Crushing Apples with a Meat Grinder (Don't...)

We also crushed and pressed another round of apples that day.  On the recommendation of an internet site, instead of using a proper crusher, we tried a large meat grinder. It didn't work very well. The grinder worm wasn't able to put the apples through the machine, so we had to force them through with the plunger.  We ended up crushing the apples more with the plunger than the blade of the grinder.  It took forever.  Never again.


Dinner

Part way through the afternoon we pulled out the hard cider, which was in its bubbly, alcoholic, sweet spot.

For dinner, since the kitchen was tied up with people chopping vegetables and boiling jars, we ate simple dishes that could be prepared well in advance.

First was headcheese, ideal for serving large groups because a) it's cheap as nails, and b) it can be made the night before and simply sliced to order.  Taken with pumpkin seed oil and cider vinegar.


Next we put out some roasts: pork shoulder, pork belly, and beef eye of round.  Sliced and served on crusty buns with coleslaw and homemade potato chips.

A jar of each preserve was set out to sample with the sandwiches.


Dessert was sour cherry pie and vanilla ice cream.


Thanks to those who helped out.  I have you all scheduled for next September.
Monday, September 19, 2011

Highbush Cranberries

A bucket of highbush cranberries picked from the Edmonton river valley
Most of the highbush cranberries in the nearby park have lengthened into a distinct oval shape, which means they're ready for picking.

Often when harvesting or foraging in balmy summer, I find myself looking forward to the colder months ahead.

Much of the past year has been devoted to exploring seasonality beyond ingredients: looking at traditional dishes and meals that mark the season.  I pick highbush cranberries mostly for use in two meals: Thanksgiving and Christmas dinners.  (If there's a little extra that can be enjoyed in November with some game meats, all the better.)  So as I romp through the bush in late summer, I'm actually thinking about fall and winter.

Similarly, when candying cherries in August, I might envision a Christmas cake, or when picking pumpkins in September, a jack-o-lantern.  So it is with seasonal eating, that one eye looks back on the past, and one looks forward to the future.

To separate the cranberries from their stems and pits, I use a food mill with a fine die.  I cook out the sauce with a good pinch of salt, and honey.

After being processed in the canning pot, the jars will wait in the cellar until the turkey is killed.

Sunday, September 18, 2011

Vegetable Off-Cuts

Carrot tops and parsley
One of the benefits of getting vegetables from a CSA, farmers' market, or backyard garden, is that you often get the entire plant.

As with animals, there are parts of certain vegetables that are usually thrown out.  The most common examples are the green leaves of vegetables that are grown for their roots or stalks.  These greens deteriorate quickly after picking, so they're cut off before the vegetables are shipped to the supermarket.

Of course, not all vegetable off-cuts can be eaten.  Some are poisonous (the leaves of the nightshade family, including potato and tomato), and I find that some that do make their way to the farmers' market are of dubious eating quality.

Let's start with the good ones.  Here are some vegetable off-cuts I like, and some ideas on how to use them.
  • Beet Greens - Primo greens.  Much like Swiss chard, with colourful, tender, stalks.
  • Celery Leaves - One of my favourite greens of all time.  The leaves from the light green heart are especially good.  They are tender, and taste more like celery than the stalk.
  • Onion Greens (not to be confused with green onions...) - Green onions are a variety of allium developed for their long green shoots.  Varieties of onion grown for their bulbs (eg. Spanish, White, Walla Walla) still have edible greens, though they rarely make it to the supermarket.  They aren't as tender as green onions, but they still make for good eats, especially when folded into dough and deep fried.
  • Horseradish Greens - I was surprised when I saw these at the farmers' market.  They taste remarkably similar to the root, though with less pungency.  They can be used sparingly in green salads, or minced and folded in a compound butter for steak.
  • Radish Greens - Peppery taste similar to the radishes themselves.  Good as salad greens, or chopped and mixed into radish butter.

I've seen the following greens for sale at farmers' markets, or have tried them at Tipi Creek, and found that they have inferior eating quality.  If you've successfully prepared any of the veg below, I'm curious to know how you did it.
  • Carrot TopsSome sources say you can make soup with carrot tops, though I find them too tough.  My only success with carrot tops has been in making a flavoured oil.
  • Kohlrabi GreensThese walk the line.  I find them too tough, whether raw or cooked.
  • Cabbage Greens - By "cabbage greens" I mean the large leaves at the base of the stalk that fall away from the head.  Like kohlrabi greens I find them too tough, even when braised.
  • Broccoli Greens - I've heard people rave about broccoli greens, but I've found them inedible, even with extended cooking.  I think maybe the young greens that are taken while thinning the garden are good, but the leaves taken once the plant has gone to seed are fibrous.

Friday, September 16, 2011

Hard Cider

A mug of hard cider on the back porch
Earlier in the month we pressed our apples into cider.  The juice that ran from the press was sweet and tart, with a full, milky mouthfeel, and a subtle siltiness that I think was from the skins and seeds of the fruit.  It had a cloudy, oxidated colour and was a pleasing drink in all of its many facets.

Then the cider sat in my basement for a week.  Fermentation took hold, and for a brief few days, the cider got even better.  A yeasty aroma developed, and the resulting alcohol woke up the palate.  The drink was effervescent.

I should have bottled all my cider at this stage.  Hindsight is 20/20.

As it is, I left the cider to ferment for another two weeks before bottling.  By this time not a molecule of sugar remained.  In these later stages of fermentation some marked off-odours developed, notably sulphur (rotten egg) and acetone (nail polish remover).  Some of these odours persist in the bottled cider.

Do I still drink it?  Yes.  Only when very cold.  I also cook with it.  Cabbage sautéed in bacon or lard, then briefly braised in apple cider, for instance.

It also makes a passable mulled cider, sweetened with honey and simmered with spices like cinnamon and clove.

Can't wait for next year, when I encapsulate that cider in its sweet spot.

Monday, September 12, 2011

Rhubarb Leaves: A Thought Experiment

Rhubarb leaves, considered poisonousBefore I say anything else, please, please, please don't eat rhubarb leaves.  They're considered poisonous.

That being said, I have a theory that I'm working out.  I'm wondering if there is a way to prepare rhubarb leaves so that they aren't poisonous.

I started thinking about this after reading about taro.  Taro root is a tuber native to India, but common in the cuisines of the Caribbean, South America, Polynesia, and much of Asia.

Taro, both the tuber and the leaves, contain a large amount of calcium oxalate.  When eaten raw they burn your mouth and throat, but boiling them dissolves the oxalates and renders them safe to eat.

Rhubarb leaves also contain a large amount of oxalate, and according to most sources this is the chief reason they are considered poisonous.  If it is this soluble compound that makes rhubarb leaves unsafe for consumption, we might be able to boil the leaves and drive off the toxin, just as in taro leaf preparation.

As I mention in my disclaimer, I'm not a chemist or a botanist.  For all I know the oxalate content of rhubarb leaves is too high for boiling to be effective.  Or maybe there are other compounds that are responsible for its toxicity.[1]

I have no idea.  I don't plan on testing it out myself.  I'll leave it for the food scientists.  (Though of course no one is studying rhubarb: it's a hardy perennial that already grows in most backyards, and there's no money to be made from it.)

I'm just wondering out loud.


1. McGee, Harold. On Food and Cooking. ©2004 Scribner, New York. Page 367.

Sunday, September 11, 2011

Notes on the Evans Cherry

This was the first year that I got to work with a good deal of Evans cherry, a sour cherry variety that grows well around Edmonton.  It's a very different beast than the sweet BC Bing cherries I've used in the past.

In some applications you can more or less substitute our sour cherries for Bings.  In others you can't.  Here are my findings.


Baked Goods

A sour cherry pie, fresh from the ovenThis is what God intended us to do with sour cherries: bake them in pastry.

I don't have a recipe for sour cherry pie.  In fact, I don't think you should use a recipe, because different cherries have different levels of moisture, sugar, and acidity, and additions of cornstarch and sugar should be varied accordingly.

Here's my process.  Macerate the pitted cherries in about half their weight of granulated sugar and a good pinch of salt.  I also like to add lemon or orange zest.  Leave the mixture at room temperature for at least an hour.  This draws a lot of liquid out of the fruit.

Transfer the cherry mixture to a pot and bring to a simmer.  Meanwhile, prepare a cornstarch slurry of one part starch and one part water.  Stir the slurry into the cherries.  This is the trickiest part of the preparation, as you want the filling to set after the pie has been baked and cooled to room temperature.  When a spoon is dragged through the cherries, it should take a few seconds for the mixture to level out and fill in the trench.  Taste and adjust sweetness.

Cool the mixture to room temperature to make sure that it sets properly.  Then transfer the filling to a bowl and refrigerate until chilled thoroughly.  It's important for the filling to be cold at the start of baking for two reasons.  First, if you are covering the filling with any pastry, especially a delicate pattern like the lattice, above, the pastry will be much easier to work with if it is resting on cold filling.  If you try to arrange a pastry lattice on warm filling, the fat in the dough will melt and the pastry will be more or less unworkable.  Second, if you put a warm pie into a hot oven, the filling will likely boil over the lattice and over-cook, forming a rubbery skin on top of the pie.

After making a properly thickened filling, the most important part of our pie, and of any pie for that matter, is a properly baked crust.

Undercooked Pastry: A Rant

Cross-section of an underbaked strudel.  Gross.At right is a strudel (the French style, made of braided puff-pastry, not the Austrian style...) that is sold at a reasonably popular coffee shop.

The staff that bakes these convenience products no doubt look for a certain pale golden brown colour to form on the outside of the pastries, then immediately pull them from the oven - even though there is still a thick mat of raw dough inside!

Make sure your dough is cooked all the way through, so that it's flaky and tender.  Don't just look at the dough: touch it to make sure it's firm throughout.


Glacé Cherries

Last Christmas I made a fruit cake filled with glacé Bing cherries, hazelnuts, and candied orange peel.  I decided to try making glacé sour cherries this year.  The process is described in the fruit cake post, linked about.


The sweet and sour taste of the cherries was fantastic.  The sour cherries are much more delicate than the Bings, and looked a little haggard after the boiling.  They didn't entirely break apart, but I expect them to turn to mash when folded into the dense pound cake batter that I use for the fruit cake.  We'll see soon enough.

The syrup that the glacé cherries are preserved in is fantastic in sparkling water.


Dried Cherries

Dried sour cherriesEvans cherries do dry okay, but it takes forever.  In my dehydrater, running on the "Fruit/Vegetable" setting (135F), it took 30 hours to reach raisin consistency.

The dried cherries are extremely sour, even more so than when fresh (which I should have anticipated...)

I had originally planned to eat these dried cherries in yogurt and granola, but they are way too tart to be consumed with tangy yogurt.  Suggested alternative uses: game terrines, "Raincoast Crisp" style cracker, and other applications where there is meat or starch to temper their acidity.


Rumpot

Last year BC Bings were one of several fruits I threw into my rumpot.  I imagine that this preparation would benefit hugely from the acidity of the Evans cherry.

Last year I noticed that the more delicate fruit, notably raspberries, broke up into tiny pieces in the pot.  I suspect this will be true of the Evans cherries.

The many varieties of fruit in a rumpot blend together to form a generic "red fruit" taste, so this year I made "single fruit rumpots," ie. one pot entirely of sour cherries, one of plums, and so on.  Hopefully these pots develop unique flavours that will showcase the fruit better.  I'll get back to you on the results.


Conclusion

Sour cherry varieties like Evans and Nanking generally bring more taste and complexity to the table than sweet varieties like Bing.  The principle difficulty in working with them is their delicate, moist flesh, which damages easily.  They can be used in most sweet cherry applications, though they generally will not maintain their round shape.

Saturday, September 10, 2011

Fall Foraging around Hinton

While on the AMS Great Alberta mushroom foray near Hinton, we found a few other types of wild edibles.

Labrador Tea

Some Labrador tea, sharing a basket with yellow suillus mushrooms

Labrador tea is a little evergreen shrub.  It was once commonly brewed by the natives and used in countless medicinal applications.  It was also part of some of the traditional gruit mixtures of northern Europe.  (For an explanation of gruit, and why it could be important to our provincial brewing identity, please see Alberta Beer: A Thought Experiment.)

The principle flavour of Labrador tea is minty evergreen.  I swear when I bruise the fresh leaves I also get a sweet melon aroma, but I haven't been able to convince others of this, nor have I been able to coax that flavour into solution.  Labrador tea can be used much like young evergreen buds, in tea, syrups, and dry cures for meat.


Buffaloberry

Many trails we walked were absolutely overgrown with buffaloberry.  The fruit is tart, bitter, and slightly soapy.  There is some good information on-line about the traditional uses of buffaloberry (also known as foamberry, soapberry, and sopolallie).  Most interesting is the practice of beating the berries in a large bowl until a meringue-like foam develops.  This preparation is called Indian ice cream.
A branch full of buffaloberries


Bog Cranberry

I didn't even know bog cranberries grew in Alberta.  These are the low-lying cranberries that are traditionally maintained and harvested by flooding the field in which they grow.

While we stepped over plenty of cranberry bushes, ripe berries were few and far between.  Those I was able to sample had the classic tart and bitter blend we expect from bog cranberries.

Some of the low-lying bog cranberries we found


Walking in the woods is fun.
 A look up through the pines

Friday, September 9, 2011

High Season for Mushrooms

We've been enjoying a lot of mushrooms of late.  There have been two Alberta Mycological Society events in the past month that have had us eating and contemplating mushrooms non-stop.

First was the AMS Expo, the City of Champignons at the Devonian Botanical Gardens.  Chad and Thea dreamed up a fantastic soup and mushroom tasting plate that Lisa and I helped them cook and serve.

Then on the Labour Day weekend we headed out to Hinton for the AMS Great Alberta Foray.  Above left are some of the edible vareties found that weekend.

Thank you to the AMS for enriching our culinary life and letting us explore the Alberta countryside, turning over logs and hopping over streams in pursuit of fungi.  And thank you to Chad and Thea for getting us involved in that organization in the first place.

I'll leave you with a couple of the mushroom plates I cooked this month.

Mo-Na Foods, an Edmonton distributor specializing in foraged food, recently brought in some enormous morels from the Yukon.  Here they are stuffed with rabbit mousseline and served with carrot purée:


Hedgehog mushrooms look similar to chantrelles, only they have teeth under the cap instead of ridges. Most mushroomers agree that hedgehogs are tastier than their more-famous cousins.  After a quick sautée Lisa and I ate some on grilled flatbread with goat cheese and charred green onion.

Thursday, September 8, 2011

Apple Cider

To most contemporary city-folk the word "cider" implies fermented apple juice.  My grandparents made the distinction between "cider" (juice pressed from apples) and "hard cider" (fermented apple juice).  For now I have simply made cider, and will leave the discussion of hard cider and its variants for another post.

This week we picked about 150 lbs of apples from three different trees:
  • one beautiful, well-trained tree yielding large, blushing apples, which I will be referring to as "Ron's apples";
  • one crabapple tree with bright red, tart fruit;
  • one hideous, unkempt tree in our backyard that grows small green apples.  The tree is so large and spindly that we harvested its apples by climbing into it, shaking it vigorously, and then collecting the fallen fruit from the surrounding grass.
After harvesting, we borrowed a crusher and press from Kevin.  The crusher is a garburator, intended for a kitchen sink, outfitted with a hopper and a power switch.  You can read about Kevin's design here.  The press is a strong wooden frame with a carjack that drives a plunger onto the crushed fruit, described here.  Thank you, Kevin.

Some notes and photos from our cider day.

Here are the apples we used.  Below, left are the crab apples.  Below, right, Ron's gorgeous apples.


And here are the tiny, bruised apples from our backyard.  They don't look particularly appetizing, but apparently they make for good cider.


Some sources say to wash and stem the apples before crushing.  Others say this is unnecessary.

Here is Kevin's crusher, doing what it does best.  The apple mash comes out white, then rapidly oxidizes to the rusty colour we associate with apple juice.

With a traditional crusher the mash will sometimes be put through a second time for a finer grind.  This in unnecessary with the garburator.  It's very thorough.


The apple mash is scooped into a piece of cloth, which is twisted and squeezed to extract some of the juice.  We found that at least 90% of the juice could be pressed from the mash in this manner, without the use of the actual press.


Once the mash wrapped in cloth is shaped into a disc it is called a "cheese."  Some sources say to tie the cloth with a peice of string.  This is unnecessary.  The cheeses are stacked inside the press.  Some sources say to place wooden discs bewteen the cheeses.  This is also unnecessary.


Then the car-jack is opened to drive the plunger onto the cheeses.  The juice flows out of a spigot at the bottom of the bucket.


After being pressed, the cheese is dense, dry, and crumbly.  The left-over bits are called pomace.  In many parts of Europe grape pomace is mixed with water and sugar, fermented into a weak "wine," and then distilled.  The resulting liquor is called grappa in Italy (especially famous in the provinces of Friuli and Piedmonte), marc in France, and tsipouro in Greece, to name only a few of the regional variations.  I suspect a similar drink could be made from this apple pomace.


We crushed and pressed the three different apples separately so we could taste the juices on their own.  Tasting notes:
  • Ron's Apple Cider - A good balance of tart and sweet, with a hint of almond extract, probably from the seeds and skins.  Slightly silty mouthfeel.  Reddish brown.
  • Crabapple Cider - Very tart, but still surprisingly flavourful and pleasant to drink.  Brilliant pinkish red.

  • Our Backyard Apple Cider - This was the real surprise for me.  They are by no means choice eating-apples, and most were battered and bruised by our harvesting method.  Their juice, however, was fantastic.  A great balance of tart and sweet, and a distinct grassy finish.
The three types of cider were then mixed together.  While "single variety" may be popular with coffee and wine, apple cider and any of its fermented and distilled derivatives are always made from a blend of several apple varieties.  Half the work of the cider producer is in finding the right mix of sweet, tart, and aromatic apples to create a balanced drink.

Once mixed, the cider was syphoned into carboys to clear over night.  The roughly 150 lbs of apples made 40 L of cider.

 
This really is one of those epic, rewarding, seasonal "chores," like tapping maple trees and slaughtering pigs.  There's lots to be done with the cider, yet.  Stay tuned.

Wednesday, September 7, 2011

Rose Hip Jelly (With a Brief Description of the Chemistry of Jellies)

When rose flowers wither and fall from the plant, they leave behind a little green ball called a rose hip.  In late summer those hips swell and turn red, and start to look like berries.

They are not berries, as you will discover if you open one up.  Rosehips are full of seeds and what looks like white hair.  If eaten raw those hairs will irritate your mouth and throat.  Don't eat those hairs raw.  The fleshy part around the seeds and hair can be eaten raw.  It has an interesting flavour; depending on the plant and the time of year it can taste like fresh cut grass, or a tomato, or possibly a plum.

Though rose hips can be eaten fresh, they are most commonly made into jelly. They contain little pectin, so the jelly usually contains another fruit, like apple.

Two hours have passed between when I wrote that last sentence and when I wrote this one.  It crossed my mind that I don't really know what pectin is, so I read a large section of On Food and Cooking to find out.  If you like, I can tell you what I found.


The Chemistry of Jellies

Unlike animals, plants get all their nutrients and energy from soil and air and sunshine.  They therefore stay in one place, and require a rigid framework on which to grow.  Like animal cells, plant cells are made of fluid enclosed in little sacks of a semi-permeable membrane.  Unlike animal cells, they also have a firm wall surrounding their cell membranes for additional structural support.

These cell walls are analogous to reinforced concrete.  Fibers of cellulose act as the iron rods, and hemicellulose and pectin act as the cement that cross-links the iron rods.  Hemicellulose is made of glucose and xylose sugars, while pectin is in fact "long chains of sugar-like subunits,"[1] whatever the hell that means.

Here are some things that happen when we cut and cook fruit:
  • the thermal and physical disturbance breaks the pectin chains in the cell walls apart,
  • cell membranes rupture, spilling cell fuild everywhere, and
  • the loosed pectin dissolves in that cell fluid (and any other liquid you have added to the mix).
The pectin does not re-form into its characteristic chains because it has been diluted, and the sub-units can't reach eachother.  To aggravate the matter, the pectin sub-units accumulate a negative electrical charge, and so are actually repelled by eachother!

As sympathic cooks we can help pectin chains re-form by doing the following:
  • adding sugar - Sugar is hygroscopic and attracts water.  With water molecules flocking towards the sugar, the pectin molecules have an easier time finding eachother.
  • boiling off excess water - This also reduces the distance between pectin molecules
  • adding acid - Acidic solutions are full of hydrogen ions (H+) that neutralize the pectin molecules' negative charge.  After contact with a hydrogen ion, the pectin molecules no longer repel one another.
The three steps above that help reform pectin chains also happen to preserve the fruit!

With the pectin chains re-formed, there is now a network that traps water and gives the jelly its characteristic firm-but-wiggly texture.

Don't you feel empowered by all this information?  Put it to good use:


Rosehip and Apple Jelly
adapted from River Cottage Handbook No. 2 - Preserves

Ingredients
  • 325 g rosehips
  • 775 g apples, peeled and quartered (I used windfall apples from my questionable backyard apple tree, removing any severely damaged sections)
  • roughly 550 g sugar
Procedure

Place the quartered apples in a straight-sided pan.  Cover with water.  Bring to a boil, then simmer until the apples soften and turn to pulp.


In the mean time, chop the rosehips in a food processor.


Add the rosehips to the pan and simmer for 10 minutes.


Remove the pan from the heat and let stand for 10 minutes.  Pour the mixture into a scalded jelly bag suspended over a bowl. Drain for several hours.  After 24 hours I ended up with about 800 mL liquid.


Measure the juice and put it into a pot. Bring to a boil, then add 400 g of sugar for each 600 mL of juice. (My 800 mL of liquid required 533 g sugar.) Stir until completely dissolved, then boil to setting point, 220F.


After boiling I had roughly 500 mL jelly. Pour into hot sterilized jars.


1.  McGee, Harold. On Food and Cooking. ©2004 Scribner, New York. Page 296.  This is the only direct citation I used, but really all of the scientific info is from this invaluable reference.