skip to main |
skip to sidebar
1: Make the cure mix: kosher salt, curing salt, fresh coarse ground black pepper, crumbled bay leaves, fresh ground nutmeg, crushed juniper berries, brown sugar, and fresh thyme. The complete recipe can be found in Michael Ruhlman's Charcuterie.
2: Trim the belly. Square the edges. The slab I had also happened to have the skin on, which must be removed. Try to leave a thin layer of fat on the belly, as it will protect the meat during the drying period. You can see below that I cut too deep, into the meat, in a couple places. Not the end of the world, but not ideal, either.

 3: Rub the cure mix onto the belly.
4: Place the belly in a non-reactive container or large resealable bag. Refrigerate for one week. 5: Every couple of days, take the belly out and redistribute the cure. This is called overhauling. It's like giving the pork belly a massage.6: After about one week, the belly will be firm to the touch. Rinse off the seasoning and dry the meat thoroughly. Give what will be the interior of the rolled pancetta (that is, the side that did not have skin on it...) a fresh coat of cracked black pepper.

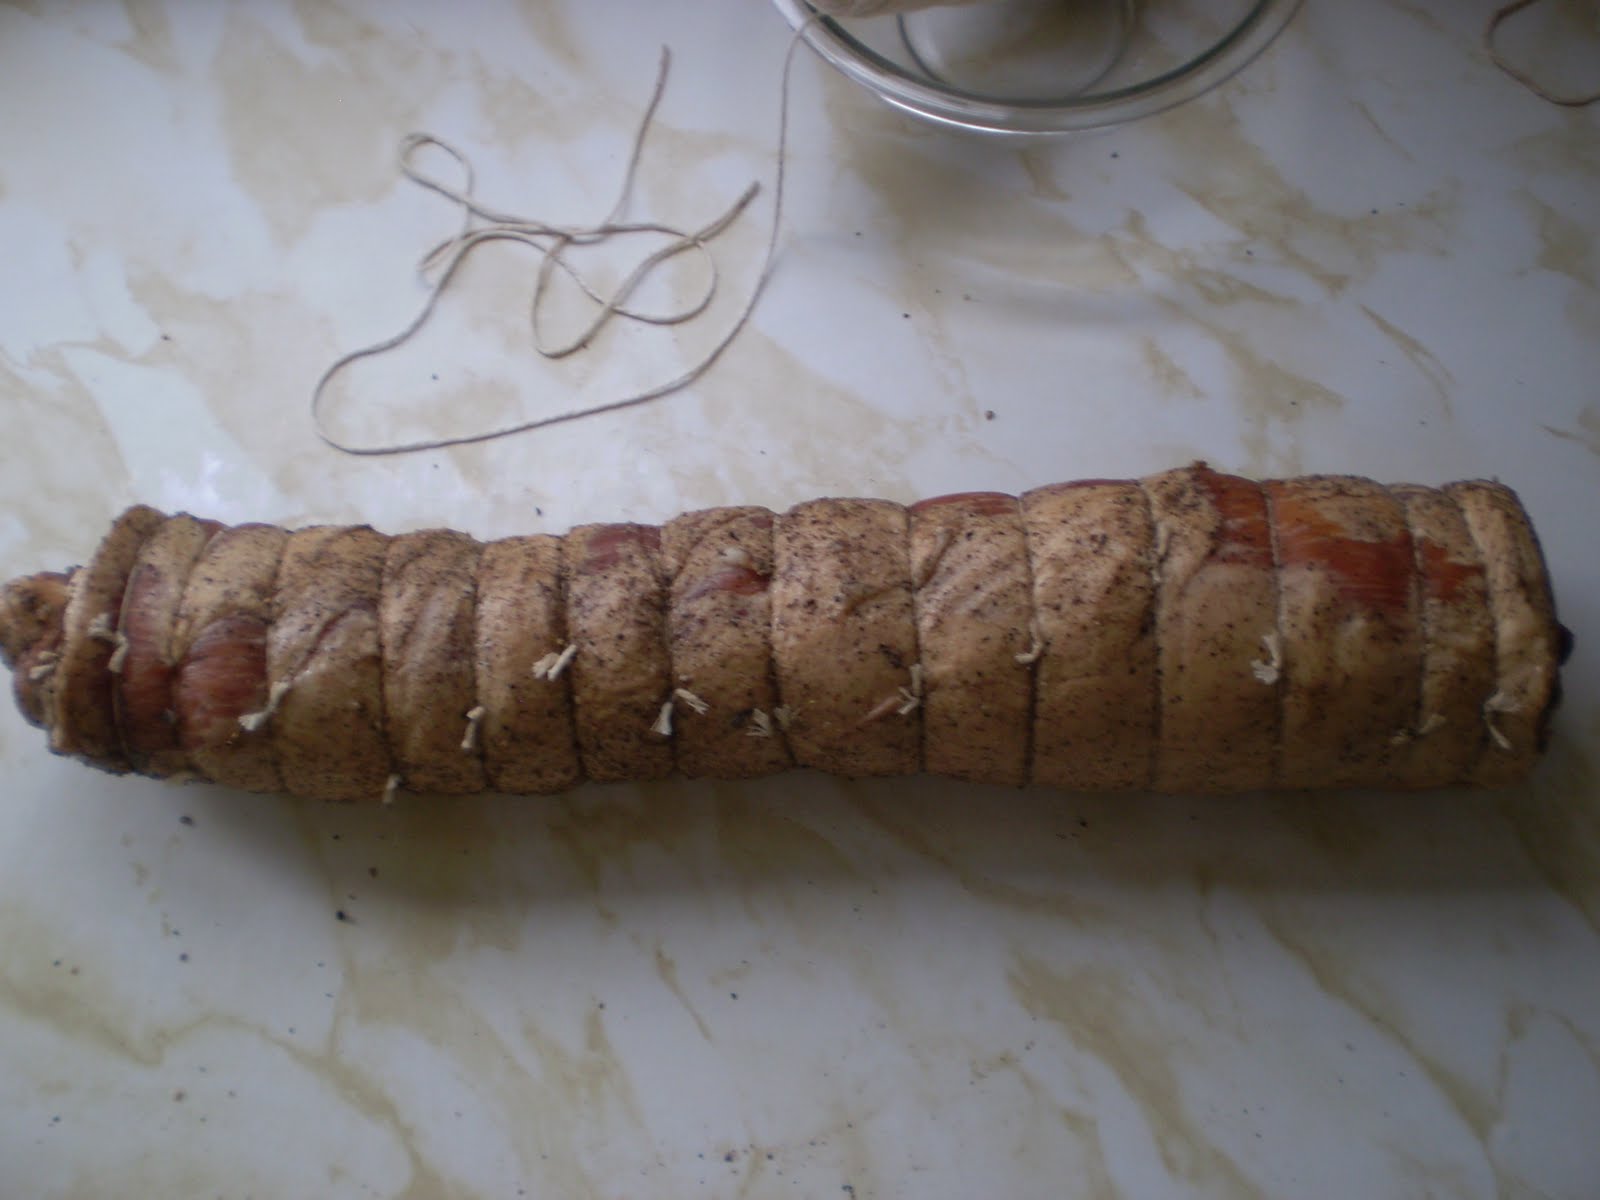
7: The hard part: roll and tie the belly. I start with a single loop in the middle just to secure the roll.
Then I tie a loop roughly every inch across the length of the roll. For good measure, I tie a loop between each of the other loops, so there is one loop every half inch.
8: Hang to dry for two weeks. This is tricky, here in Edmonton. Ideal conditions are between 8°C and 15°C, and between 50% and 60% humidity. Michael Ruhlman says that he hangs his pancetta in his kitchen, with his pots and pans. This leads me to believe that temperature is not so critical. Improper humidity, on the other hand, can really mess up a pancetta. If the air is too moist, not only will the meat not dry, but mold may develop. Too dry, and the exterior will harden and trap moisture within. I carried a humidity probe through the different rooms in my house, and they all were between 30% and 40%, even the concrete prison cell that is the laundry room. Once it poured rain for a few days and the humidity crept up to 50%.
As I don't have a naturally cool, damp cellar, I hung the pancetta in a closet, and ran a small cold-air humidifier in the adjacent room. I managed to keep the humidity between 40% and 70%, and the temperature just under 20°C. Over the two week drying process, some of the small, protruding pieces of meat on the two ends dried to diamond-like hardness, but the properly tied portions became firm, with just a little give. 9: Enjoy.
I recently looked up "mozzarella" in Larousse, and found the following descriptions:
- "a fresh cheese, springy and white"
- "kept in salted water or whey, shaped into balls or loaves of varying size"
This sounded utterly unlike any mozzarella I've had before. Turns out there are two types of mozzarella in this world: the traditional fresh mozzarella, described above, and the American low-moisture mozzarella, which includes the familiar white bricks at the grocery store. Traditional mozzarella belongs to a class of cheeses called pasta filata, which means "spun paste" or "spun curds". The curds are heated, then stretched repeatedly to develop an elastic texture in the finished cheese. Other cheeses made by this method are provolone, scamorza, and caciocavallo.
I later found out that I have had traditional, fresh mozzarella, in the form of bocconcini, which is not a distinct type of cheese, but rather a specific shape ("bite-sized") of mozzarella. The process of cutting and shaping pasta filata is called mozzatura. Besides bocconcini, there are other traditional shapes, like trecce (braids) and nodini (little knots).
There are hundreds of pages on the internet that explain how to make fresh mozzarella at home. Most of these use citric acid to acidify the milk. I am using bacterial cultures from Danlac, which are supposed to result in a more aromatic, spongy cheese. As with the yogurt earlier this week, I was working from the cursory, quasi-industrial specifications supplied by Danlac. After two botched attempts, I finally made good mozzarella with the help of this instructive demonstration by Fias Co Farm in Michigan.
Making Mozzarella with Danlac Bacterial Cultures
The following is for 4L of whole milk.
Heat the milk to 34°C. This is the ideal incubation temperature for the cultures.
Add a pinch (about 1/8 tsp) of the bacterial cultures, Choozit TM 81. Stir briskly. Hold at 34°C until the pH drops to 6.5, about one hour. I held my milk in a warm water bath to stabilize the temperature.
Add roughly 1/10 of a packet of Valiren microbial cheese rennet (one packet is for 50L of milk). Stir the mixture. The rennet will coagulate the proteins in the milk to form curds. The ideal temperature for the rennet is the same as for the bacterial culture, 34°C. Coagulation is complete when you obtain a "clean break". To perform a clean break test, stick your finger in the pot and pull it through the curd a couple inches. The curd should separate cleanly, and clear whey should pool in the crevice (see photo, below). My coagulation times ranged from 1.5 to 2 hours.

Cut the curd into small pieces, about 2-2.5cm, with a sharp knife. This releases whey from within the curd, making for less moisture in the finished cheese. Let the curds rest for 5-10 minutes.
Hold the mixture at 34°C for about an hour, stirring occasionally during the first half hour. This stage gives the bacteria time to create more lactic acid. The pH must fall to around 5.0 or the curd will not stretch properly when it comes time to make the pasta filata. While stirring, the curds will shrink and harden somewhat as they release their whey, but they should remain moist, gel-like, and delicate.
Pour the curds and whey through cheesecloth. Strain until no more whey drips through the cloth. While straining, the curds will knit back together to form a homogeneous mass.
 We now have cheese, but we need to make it into pasta filata. By heating and stretching the cheese we rid the curd of excess whey and give the final product its characteristic texture. You can heat the cheese either in a microwave, or in a pot of simmering water held around 70°C.
Once heated the cheese should stretch under its own weight. You will see whey run out of the cheese as it stretches. When the cheese cools and becomes less pliable, reheat it by your chosen method. Now is the best time to add salt.

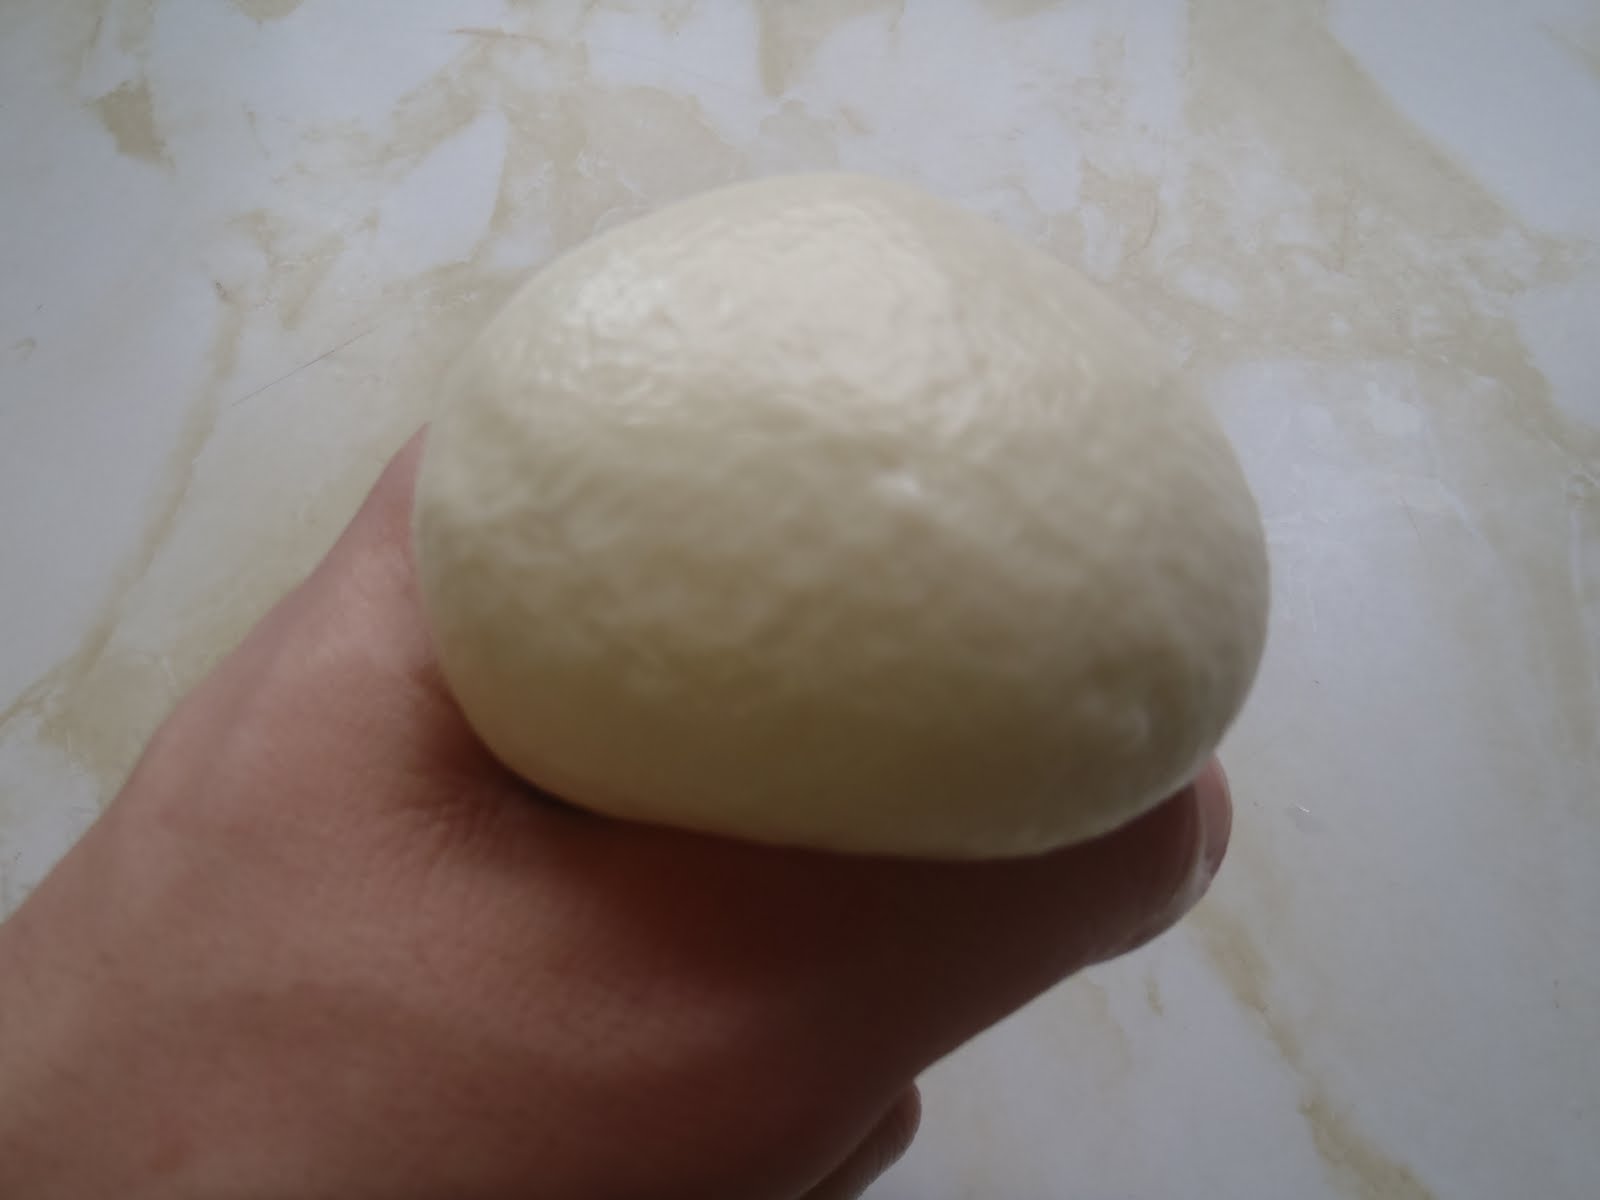
The last step is mozzatura, the shaping of the pasta filata. The most common shape is the sphere. Simply squeeze a section of the cheese so that it bulges out of your hand. Tuck the free end remaining in your hand into the bottom of the sphere.
 To make bocconcini, use plastic wrap to roll the heated cheese into a log about one inch in diameter. Tie a knot of twine every inch, and refrigerate for eight hours. Cut the twine and unwrap the cheese. Separate the bocconcini and marinate in olive oil.


[Update May 28, 2010: Here's a shot of the margherita pizza we made with the mozzarella.]

 My ideal yogurt is Greek yogurt, which is thick, rich, flavourful, and made of sheep's milk. Unable to find whole sheep's milk, I'm experimenting with goat's milk from Fairwinds Farm of Fort Macleod, Alberta, as it is fattier (and just more Greek) than cow's milk.
There are two ways to make yogurt at home. The first is to add a small amount of commercial yogurt containing active cultures to milk. The second is to use pure bacterial cultures. Regardless of which method you use, the process is basically the same.
Danlac Starter Kit
I eventually want to make cheese with pure bacterial cultures. I contacted Danlac in Airdrie, and ordered a starter kit containing several doses of rennet and cultures for yogurt, mozzarella, and feta.
The rennet and cultures were put in an envelope and mailed to me. The recipes for yogurt, feta, and mozzarella were e-mailed. Danlac's motto is "Serving the food industry," not "Serving the interested individual," and the recipes reflect that fact: they're more like industrial specifications than recipes. There are values measured in pounds per square inch, and mention of back pressure valves and plant conditions. All the relevant temperatures and times are listed, but to understand exactly how the process might be done in a kitchen, I consulted a few of the several hundred sources on the internet.
Yogurt: A First Attempt
Mise en Place
First, in my kitchen sinks, I set up an ice bath and a 45°C warm water bath. The first is for cooling the hot milk, the second is for holding the milk at the bacteria's incubation temperature.
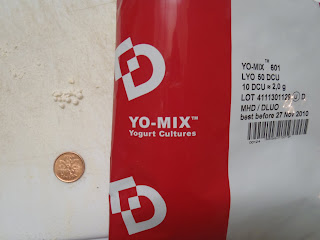
 Next I measured out the yogurt cultures. The YO-MIX 601 packet I received contains freeze-dried pellets of the two most common cultures used in yogurt production: Lactobacillus bulgaricus, and Streptococcus thermophilus. The problem is that the packet is designed to inoculate 500L of milk, and only weighs 7g. I wanted to inoculate 4L of milk, which means that I would need 0.0056g of yogurt cultures. Unfortunately, my weigh-scale is not that precise.
4L divided by 500L is 0.008.
I poured the bacteria onto a cutting board. Using a butter knife, I roughly divided the contents into five piles, then split one of the those piles into ten. I continued eye-balling smaller and smaller divisions until I had approximately eight thousandths of the original pile balanced on the end of my knife. It was about a pinch. Go figure. This is sure to be a huge source of inconsistencies between batches. I slid the rest of the pellets into a small ziploc and put them in the freezer, as per storage instructions on the packet.
 Heat the Milk
The first step in making yogurt is heating the milk and holding it at 85°C for five minutes. Besides killing any micro-organisms in the milk (which is completely redundant if you're using pasteurized dairy), the heat induces a mysterious change in the milk proteins that helps them set properly once coagulated. I heated my milk plain and simple on my stove top.

Cool the Milk to Incubation Temperature
Next the milk is cooled to around 42°C, which is the ideal temperature for the bacterial cultures. I transferred my pot to the ice bath. After a couple minutes of stirring, it had dropped to 45°C.
 Pitch Cultures and Incubate
With my milk temperature hovering around 42°C, I pitched my yogurt cultures. The milk now had to be held very close to this temperature for the next several hours.
There are lots of ideas on the internet for holding your milk at this awkward temperature, which too warm for room temperature, and too cool for an oven. I tried a simple system of thermal isolation. I tightly covered my stainless steel pot of milk, put it in the warm water bath at 45°, and covered the whole bath with plastic, and then with a thick towel. It made for a surprisingly closed system. My water bath lost a little more than 2°C every hour, at which time I would replace a few cups of water from the bath with hot water. Setting up the warm water bath in a large plastic cooler would probably work even better.

Length of Incubation
In industry, fermentation is stopped when the pH of the milk is around 4.50. I don't have any titration tools, but my Danlac recipe provided the following rough time-line: if your milk is held at 42°C, it should take six hours to reach 4.50pH, and if your milk is held at 38°C, it should take eight and a half. Though you don't want lose heat or disturb the fermentation by opening the pot too often, thickness and taste are the best indicators of when to stop the process. I ended up letting mine incubate for a little over twelve hours. This was maybe because of the inaccuracy of my yogurt culture measurement, but also because my incubation temperature slipped into the cooler end of the acceptable spectrum for a few hours.
Stir
Next was by far the most ambiguous step in the recipe: "Treatment of coagulum according to desired consistency by: stirring, using back pressure valve for improving structure, homogenizing." I ignored the second and third options, as they didn't sound like tasks I could perform in my kitchen. I stirred my yogurt, mixing the loose curd structures and whey together.
Let the Yogurt Set
Finally I left the yogurt in the fridge for twenty four hours to cool and "form a solid network".
Results
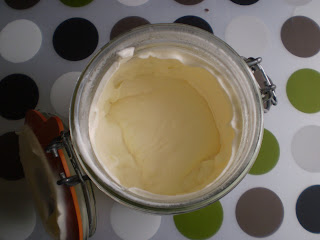
The end product was acceptable, though a little thin. After straining with cheesecloth it was much closer to my thick, creamy Greek-style yogurt. It has a very pleasing, mild acidity that is rarely found in commercial products, which tend to be a little harsh.
I think next time I'm going to use 1/8 tsp of the yogurt cultures, about double what I added this time. Hopefully that will make the process run a bit quicker, and result in a thicker product.
Today was devoted to playing with the simple formula (dairy) + (heat) + (acid) = (fresh cheese), that is, changing the dairy, acid, and amount of heat to manipulate the taste and texture of the finished cheese.
 Mascarpone
Mascarpone is made from whole cream, and is usually curdled with lemon juice or straight citric acid. My recipe from the Culinary Institute of America's Garde Manger, Third Edition, called for tartaric acid (available at brewing supply stores), the taste of which took a distant backseat to the rich, buttery flavour of the cream.- 1.92L heavy cream
- 1/2 tsp tartaric acid
Here are some brusque instructions. Heat cream to 80°C. Stir to prevent burning. Remove pot from heat and add acid. Once cream has formed curd, pour mixture into colander lined with cheesecloth. Refrigerate and let strain for twenty four hours.
Queso Blanco
Queso blanco, is another fresh cheese curdled with acid, cider vinegar in this case. While the pure citric and tartaric acids in the previous cheeses were almost undetectable, the cider vinegar makes its presence known. It has a crumbly texture, similar to ricotta.
- 1.92L whole milk
- 1 fl. oz cider vinegar
- 2 tbsp kosher salt
Heat milk to 85°C. Stir to prevent burning. Slowly add vinegar and salt while stirring. Once milk has formed curd, remove pot from heat. Pour mixture into colander lined with cheesecloth. Refrigerate and let strain for one to three hours.
 Lemon Ricotta
The queso blanco produced a large quantity of fairly clear whey, and the mascarpone left a small amount of relatively thick, opaque whey. I combined the two to make a third batch of cheese, something approaching a traditional ricotta.
Loosely following a procedure for lemon cheese (intended for use with whole milk and cream, not whey...) I heated the whey mixture to 38°C, then slowly added lemon juice, stirring gently, until curds formed. I removed the pot from the heat, and let it sit at room temperature for a few hours. Then I strained the mixture for several hours to remove the whey.
I think the reason for the lower temperature in the recipe is this: since we want the lemon flavour to be fairly dominant, there will be lots of acid in the cheese, and therefore less heat is required to coagulate the proteins. With other cheeses like mascarpone, we don't want lots of acidity in the finished product, so we need more heat to help coagulate the proteins.
The lemon ricotta had very fine, moist grains, and (obviously...) a strong lemon flavour. I added a bit of lemon zest and salt after straining, and mixed it with sliced cucumbers, red onions, and a few cracks of black pepper for a simple salad.
 I'm starting my foray into cheese-making with a few simple, fresh cheeses. First I'd like to cover the basics.
Cheese: A Blunt Introduction
Cheese is curdled dairy. "Curdling" is the coagulation of proteins. In cheese-making, heat, acid, and certain enzymes are used to coagulate the major protein in dairy, casein. Subjecting dairy to heat and acid or enzymes (or both) will separate the mixture into solid curds and liquid whey. The curds contain most of the protein, fat, and nutrients of the original dairy product. From an anthropological perspective, the principle benefit of cheese-making is that most of the energy and nutrients of the milk are solidified into a longer-lasting, easily-transported mass (that happens to taste amazing).
The whey, while mostly water, does retain a small part of the fat, protein, and nutrients, which brings us to today's project: ricotta.
Ricotta
Originally, ricotta cheese was made from the whey produced in the making of other cheeses. The word actually means "recooked". The most famous example is ricotta romana, which was once made from the whey of a hard ewe's-milk cheese called pecorino. Later in the week I hope to have the whey from a few fresh cheeses, at which time I can try a traditional ricotta. In the meantime I wanted to try the ricotta procedure with whole milk. To my knowledge, all modern commercially-sold ricotta is made straight from whole or skimmed milk, which produces a richer cheese than the traditional whey.Making Ricotta
The following recipe and procedure are paraphrased from the Culinary Institute of America's text Garde Manger, Third Edition. The only item required that is not in most homes is citric acid. Citric (also known as ascorbic) acid is sold in powder-form at brewing supply stores, and some grocery stores.
Ingredients
- 960mL whole milk
- 1/4 tsp citric acid
- 1 tbsp water
- 1/2 tsp salt
Procedure - Dissolve citric acid in water. Combine milk, acid solution, and salt.
- Heat mixture to 85°C. Stir regularly to prevent burning.
- Once 85°C is reached, turn off heat. Let mixture sit for ten minutes.
- Pour into colander lined with damp cheese cloth. Refrigerate for one to three hours.
The shocking lesson of the day was how much milk it takes to make this cheese. Using almost a litre of whole milk, I ended up with about 150g of cheese. That was after one hour of draining the curd. I suspect that if I had drained for the full three hours I would have had well under 100g.
I'm looking at other recipes in the Garde Manger that use a similar process (heat whole milk, add acid, let sit, drain) but use different acids and have much, much higher yields. The queso blanco recipe, for instance, calls for cider vinegar, and yields about eight times more grams of cheese output per gram of whole milk input. Maybe citric acid has less "coagulating power" than other acids. More research required, obviously.
Yield aside, the finished product had an exceptionally clean, mild taste. While the curd formed the characteristic granular clumps, it had a very smooth mouthfeel. Not rich or creamy, really, but smooth.
 Crème fraîche is similar to sour cream. In fact, they are made by the same process: inoculating dairy with a bacterial culture that converts lactose to lactic acid, which in turn coagulates the proteins in the dairy and thickens the mixture.
The major difference between crème fraîche and sour cream is fat content. Crème fraîche is cultured whole cream, so is about 30% fat, while sour cream is made from leaner dairy products, and is usually around 15% fat. The added fat in crème fraîche gives it two advantages over sour cream. First, it has a more luxurious texture. Second, the fat tempers the acidity, making for a subtler and more rounded flavour.
Making Crème Fraîche at Home
Fresh dairy naturally contains the bacteria that would, over time, turn cream into crème fraîche. The traditional method of production would be to simply incubate that bacteria, and let nature take care of the rest. In the age of pasteurization, we must reintroduce this bacterial strain to the cream. There are several supermarket products that contain this strain. Buttermilk is one.
To make crème fraîche at home, you need only stir one tablespoon of buttermilk into one cup of cream. Cover the mixture and leave it at room temperature for two days. Then refrigerate, which further thickens the mixture and arrests the bacterial growth.
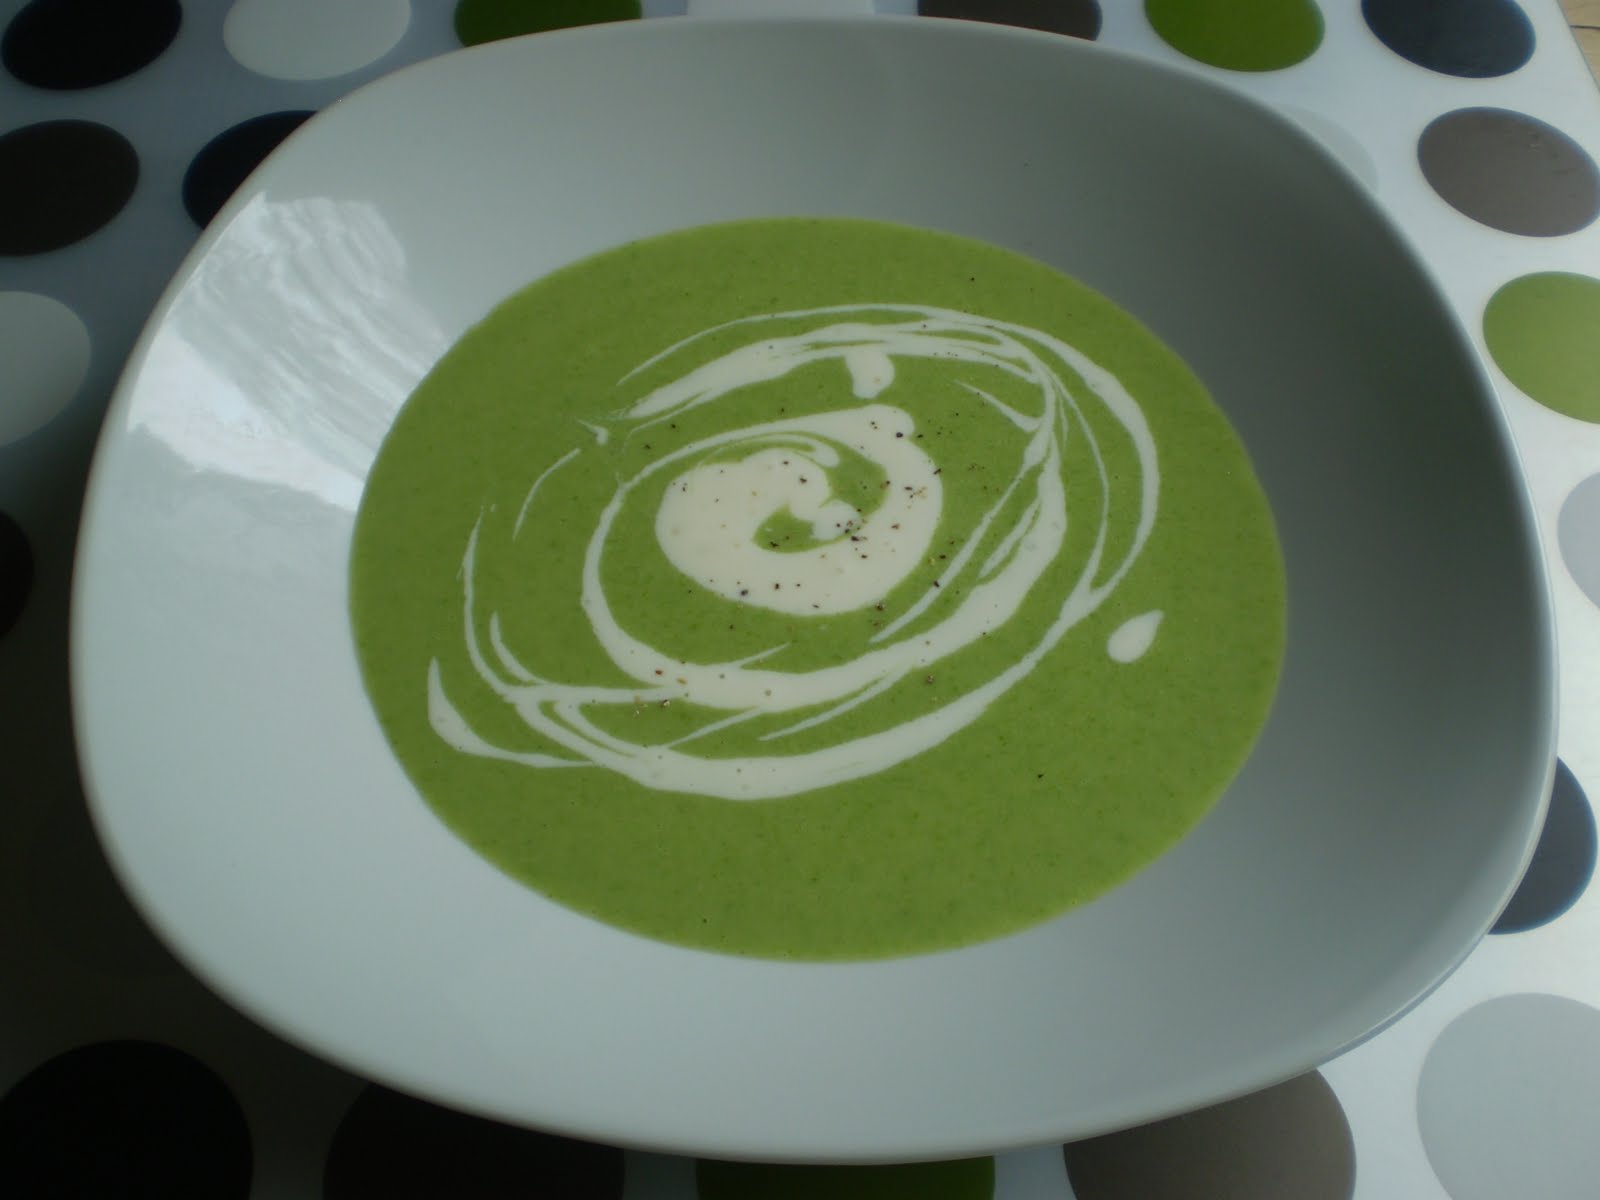
I made my first batch this week. It tastes fantastic, but has small clumps of butterfat throughout. I suspect this is because I stirred the cream once during the two day incubation. I only gave it a few gentle turns to check the progress and redistribute the ingredients, but apparently this is completely unnecessary and compromises the heavenly texture of the finished product. Oops.
Crème fraîche is perfect for finishing cream soups, as it adds a very mild, pleasing acidity to cut the richness. It being the end of May, with Edgar Farms enjoying its brief few weeks at the Strathcona market, cream of asparagus soup seemed appropriate.
 This coming week is Dairy Week.
Dairy Week was not established by Alberta Milk, or the Dairy Farmers of Canada. It was established by me, just now, and will be celebrated in my kitchen.
I have a bunch of dairy projects and recipes cluttering the back of my mind, and I've decided to perform some spring cleaning and do them all this week. I have one experiment planned for each of the next eight days. In preparation, I've stocked my fridge with cream, whole milk, and buttermilk from Dutchmen Dairy of Sicamous, BC.
So, without further ado...
Dairy Week - Day 1: Butter
I'm starting with butter because it's the most common dairy product in my house, and is dead-simple to make, requiring only cream, a container with a good seal, and a bit of salt.
I think as children most of us were taken to historical sites like Fort Edmonton to learn how the settlers made wool and horseshoes and butter. Even so, I'll start at the beginning.
You make butter by agitating cream.
It works like this. The fat in cream is in tiny globs, each covered with a membrane that prevents the fat globs from joining together. When you agitate cream, you break these coverings, releasing the fat globs, which all rush out to join their fatty brethren and form a solid mass of butter.
To commence butter-production, fill your container half way with heavy cream. Add a pinch of salt, secure the lid, and start shaking. You don't have to strain yourself, just use a gentle shake that you can sustain for maybe ten minutes. After a while the cream will thicken: the contents will be noticeably less fluid, and there will be less sloshing. At this point you've simply introduced air into the liquid and made whipped cream:
Once whipped cream has formed, it's a little more difficult to keep the cream moving in the jar. Perform a couple minutes of aggressive shaking, which will separate the butterfat and buttermilk:

While the resulting liquid is technically buttermilk, it does not have the tanginess that we usually associate with buttermilk. Unpasteurized cream has bacteria that convert lactose (the main sugar in dairy products) to lactic acid. When making butter with unpasteurized cream, the resulting buttermilk slowly develops a tangy taste as the lactic acid accumulates. Since I am using pasteurized cream, there are no active cultures, and therefore no hope for acidity. My "buttermilk" is actually just skim milk.
(As a quick interjection, these days commercial buttermilk is actually pasteurized milk that has had the above-mentioned bacterial cultures reintroduced and incubated...)
The butterfat that has clumped together must now be worked to remove small pockets of buttermilk that remain within. When making such a small amount of butter, you can just use your hands. Knead the butter. You should see droplets of buttermilk come out.
At this point the butter is usually pressed into a mold to form the familiar bricks. Or in my case, hockey pucks:

My finished product has little to distinguish itself from store-bought butter, besides a slightly richer dairy flavour. It's very good, but the benefits aren't great enough to convince me to start churning cream for my daily supply of butter. (Maybe once I have my own cow...) It's still a good experiment to try once, if only for general knowledge and appreciation of this rich but humble staple.
Fat is perhaps the main source of flavor [sic] in meat. -Professional Cooking for Canadian Chefs, Sixth Edition
Nothing in particular inspired this post, but it could have very easily been a piece of low-fat cheese, or the pastry icing at a health bakery, or maybe just a dry pork chop. I want to write a bit about the judicious use of fat to make eating more pleasurable.
Fat content in specific cuts of meat. The most common cut of pork in the supermarket is the loin centre steak (usually erroneously labeled as a boneless centre chop - there's no such thing as a boneless chop). The centre steak is the leanest part of a very lean muscle. It also happens to be the toughest, driest, and least flavourful cut of pork. This is not a coincidence. The fat marbled throughout a piece of meat gives flavour, moist mouthfeel, and tenderness, as the fat separates bundles of protein. The sirloin steak, from a section of the loin closer to the hind legs of the pig, while not as uniform or lean as the centre steak, is more flavourful, juicy, and tender, largely because it has more fat marbled throughout its mass.
The same comparison can be made between beef sirloin steaks and porterhouse or t-bone steaks, or white and dark meat on poultry.
The removal of fat from supermarket cuts of meat is health-driven, but it is part of a larger trend that distances us from the origin of our food, as well as several of the chief pleasures in consuming it. Think of the boneless, skinless chicken breast. Bones are flavourful, and crispy skin gives textural contrast to succulent meat. If the rarity of fatty cuts is health-driven, what's the excuse for removing bones and skin? It's like a weird control-tactic from Brave New World: take away all reminders of mortality so we are more content and docile.
I digress.
 Cooking with rendered fat. When searing meat in a pan we most often turn to neutral oils with high smoke points, like canola and grapeseed. If we really want to make our dish flavourful, why not sear our meat in its corresponding fat? Start a beef stew by searing chuck in tallow. Sear and baste a pork chop in lard.
Rendered animal fats can elevate non-meat dishes, too. Potatoes benefit immeasurably from the added depth of flavour. Duck fat is a common choice in France. Interestingly, McDonald's used to cook their fries in pure beef fat, before "the public's concern about cholesterol forced them to change to pure (though dangerously partially hydrogenated) vegetable oil."1
Try pie dough with lard instead of butter, especially if you're making tourtiere.
If you're wondering how to obtain rendered fat, here are some ideas:
- The simplest way is to ask your butcher for scraps, then render them yourself. It sounds like an ordeal, but it's easy. There's tons of resources online for rendering fat at home. All you do is put your scraps in a pot, add a little bit of water to distribute the heat evenly, then put the pot on a burner or in your oven on the lowest possible setting. The key is gentle heat for several hours.
- You can also save scraps yourself. Buy larger cuts of meat that you have to trim yourself, then save the fatty scraps in the freezer until you have enough to render. Having raw (that is, un-rendered) fat in your kitchen also opens up the world of sausages, pâtés, and traditional mincemeat pies.
- Start making stocks at home. Buy whole poultry instead of just breasts and save the carcasses in the freezer until you have enough to fill a large stock pot. The gently simmering stock renders the fat out of the meat trim. That fat rises to the top. When you cool your stock, the fat will solidify and is easily removed in one solid mass. The amount of fat you are left with depends on how thoroughly the carcasses have been picked over and (obviously) the amount of stock you are making.
Cooking with craft foods that release fat. The most common example is bacon. Countless classical French recipes begin by cooking bacon, then searing other meats and sweating vegetables in the rendered bacon fat. Most notable are braised dishes like boeuf bourguignon and coq au vin, to which the bacon is later reintroduced. My great aunt used to save bacon fat to fry bread for breakfast.
 Sausage works well too, but free-form sausage is better than cased sausage. The key to preparing quality cased sausages, like bratwurst, is to keep the casing in tact so that no fat is lost. This is done firstly by not scoring or puncturing the skin, and secondly by cooking on medium-low heat to prevent rupture.
Free-form sausage, on the other hand, is usually cooked and then added to a more complicated dish. The best example is Mexican-style chorizo, which is a spicy, fresh sausage. No casing means that more fat ends up in the pan, and the fat leached by chorizo is almost as valuable as the meat itself. It is bright red, and infused with paprika and chile. Try cooking some free-form chorizo, then remove the meat form the pan, leaving the fat. Fry some eggs in that fat and add the meat back (at left). Chorizo also works wonders on rice dishes. Cook chorizo with some onions. Add raw rice and coat it with the rendered fat. Add chicken stock, bring to a simmer, then cover and place in the oven until the rice is cooked. The pilaf will come out stained with the spice and pork-flavour of the chorizo.
Italian-style sausages, usually flavoured with pepper and fennel, work well in this way, too. They are sold in casings, but you can squeeze the meat out and use it free-form.
Cheese is another example that was recently brought to my attention. Cheese is not usually a base flavour like bacon, but when a meal is starting with seared cheese, maybe a saganaki meze, don't waste that cheese fat. You could cook your keftedhes in the same pan, or at least fry some bread in it.
That about does it for my rant. I'll return to a (slightly) less self-righteous tone next post.
Reference
1. Steingarten, Jeffrey. Fries, from The Man Who Ate Everything. ©1997 Vintage Books, New York. Page 415.
Lamb's quarters are popping up everywhere. Now is the best time to pick them, when they have only a few leaves, for the following reasons:
- The young leaves are the most tender. They have a bite similar to spinach, with the same creamy texture.
- The young leaves taste the best. Older leaves are a little more bland, with a wood flavour.
- Picking the leaves prevents the plant from going to seed. Once the plant goes to seed, it stops producing leaves, and it doesn't taste as good.
I suppose the above statements apply to most edible perennials that are coming into season.

Part I: Horseradish as Weed
Horseradish is a common weed in Edmonton, as invasive as it is delicious. The plant is pretty easy to identify by its distinctive curly leaves. If allowed to flourish, they eventually grow into wild, drooping masses that look like Sideshow Bob's hair. There happens to be a particularly robust example in a friend's back alley. I visited it this morning to see if my clumsy attempt at harvesting it last summer had killed it. As you can see, it's doing fine. You can also see all the dead stalks from last year's growth around the base. It's a very prodigious plant.

Last summer I was invited to help myself to the spicy root of the above plant. I had no idea what I was doing, but in August I cut away some of the growth, dug through the hard gravel, and hacked a few good chunks of root out. I used some, grated and mixed with vinegar, on barbequed steak that night. The rest I left in large pieces and froze. The taste was unmistakably horseradish, but with a fairly pronounced, bitter, woody taste. There is heat, but the mustard-flavour is pushed into the background by the woody taste.
Part II: How to Cultivate Horseradish
Since that first taste of semi-wild horseradish last summer I have done a little research.
Usually the root is harvested in the fall, after the first frost has killed off all the leaves. This is done for a few reasons: it makes harvesting easier, because you don't have to hack through the fresh stalks and leaves to get to the root; it maximizes the growing season and therefore the size of the root; and apparently the frost helps develop a more pungent flavour.
Ideally the entire root is pulled up every year, and then one of the small offshoots is replanted. Apparently older roots tend to taste woody, which explains my experience last summer. Unfortunately, the above-mentioned plant is so well-established it would take an excavation crew of twenty men to pull up the entire root and replant.
Part III: Liberating Wild Horseradish Later this morning, I stumbled across another, smaller horseradish plant, growing on a city-owned patch of lawn, just a few feet from the sidewalk.
I considered the Sisyphean life-cycle of this plant: grow, get mowed by city worker, grow, get mowed, et c.
I decided I would liberate this horseradish. I dug it up and replanted it in an inconspicuous location close to my house so that I can harvest it properly every year. (You may think that changing its naturally-occurring, semi-wild state to one of strict cultivation is the opposite of "liberating". Let's say I liberated it from neglect. And lawnmowers.)
The root was much, much longer than I expected. As I was digging on public property, and worried I was drawing attention, I rushed the job and accidentally snapped the root, leaving a few inches in the soil. It seems that to pull up even a modest horseradish root, you have to be prepared to dig a hole a foot wide and a foot deep. At this point my re-located horseradish is looking a little sickly. I gave it fresh soil and water. Hopefully it will pull through to garnish my steaks.
 I really want to like mead.
When I was a kid, before I knew exactly what mead was, I associated it with vikings and long wooden tables and serving-wenches. Even then, I wanted to like it.
My associations were correct in that mead has been a popular drink in northern Europe since antiquity. The epic poem Beowulf, for instance, is about a dragon (Grendel) that terrorizes the mead-hall of a Danish king (Hrothgar) and that dragon's subsequent ass-kicking at the hands of a young warrior (Beowulf). So yes, vikings and mead go hand in hand, but the drink is part of cultures far beyond Scandinavia, in Asia, Africa, Europe, and South America.
These days I'm trying to like mead for different reasons. Alberta has a relative abundance of quality honey, an almost complete lack of grapes (despite valiant efforts), and most of the fruits that are commonly used in home wine-making, like crabapples, berries, and chokecherries, require tinkering to get the acid and sugar levels right. Brewing with honey appeals to my snobby keep-it-local sensibilities.
I do have some reservations, though. What little mead I have tried, whether commercially-produced or home-brewed, has been thin, insipid, and completely lacking complexity. Maybe that's just the nature of the beast. But I really want to like it, so I'm soldiering on with some home-brew.
This week I started two batches of mead. One is a mixture of honey and berries (called a "melomel" in mead-speak). Specifically, it is honey from a farm near Onoway, and raspberries frozen from last year's u-pick bounty. The second batch is honey and spices, a "metheglyn". The mixture is infused with whole cloves, thin slices of ginger, and tea.
I have been working with recipes and procedures from The Winemaker's Recipe Handbook by Raymond Massaccesi, which I got from Winning Wines Plus. The melomel happily sped through primary fermentation, but the metheglyn was a little more ornery.
Problems with Metheglyn Fermentation
The initial specific gravity of my metheglyn must was above 1.100, which is well into dessert-wine sugar levels. This didn't phase me, as I wanted my spiced mead to be sweet, reminiscent of mulled wine. Alarm bells should have been going off.
I used a Wyeast product specifically designed for sweet meads. I assumed it could handle the high sugar content, but a few days after pitching there were no signs of fermentation. I diluted the must to a specific gravity of 1.085, and twenty-four hours later, the must finally started to bubble.
I guess next time I'll try sauternes yeast.
To sweeten this batch I'll use the "süsse reserve" method, which is a fancy way of saying that I'll add a bit of honey to the mead after fermentation has finished. There is some danger that fermentation could restart with the introduction of more sugar. Then I'd have sparkling mead, which actually doesn't sound too bad. We'll see.


 9: Enjoy.


