Showing posts with label Sweets. Show all posts

Sunday, December 4, 2011

Wild Rice and Barley Pudding

A variation on a Christmas classic, using some local pantry items.

I had some cooked barley in my fridge, remnants of a barley-broth.  I decided to employ the rice pudding method to save the left-overs.  (Rice Pudding Method: a lengthy secondary cooking in sugar and milk.)  The barley sucks up a lot of the milk and releases some starch into the pot.

Once a porridge has formed, cooked wild rice and dried cherries are added, and the whole lot is thickened with butter, egg yolk, and a touch of cream.

Since the wild rice and cherries are added at the end, they stay firm for textural contrast.

Wild Rice Broth: A Weird Digression

Have you ever noticed that the water you just cooked wild rice in is aromatic and flavourful and has a fantastic colour and is relatively clear?

It is.

So much so that I've started saving my wild rice broth, usually to be subtly incorporated into the same dish as the rice.  I might, for instance, reheat the rice in a bit of its own broth.

But, if you reduce the strained broth and infuse it with a bit of garlic and celery...

...I think it's good enough to be consumed as a first course.

That's weird.  I'm sorry.

Let's get back to the pudding.


Wild Rice and Barley Pudding
 
Ingredients
  • 235 g cooked pearled barley
  • 300 g whole milk
  • 30 g dark brown sugar
  • 1 pinch kosher salt
  • 1/2 stick of cinnamon
  • 50 g cooked wild rice
  • 20 g dried sour cherries
  • 30 mL brandy
  • 1 egg yolk with absolutely all remnants of white removed
  • 20 g butter
  • 30 g heavy cream
Procedure
  1. Soak the dried cherries in the brandy.
  2. Put barley in a heavy-bottomed pot and cover with milk, brown sugar, and cinnamon.  Stir to combine.  Bring to the boil then simmer until most of the milk has boiled off or been absorbed, about 40 minutes.
  3. Strain the cherries from the brandy.  Reserve the brandy.  Add the cherries and wild rice to the barley.  Remove the cinnamon stick.
  4. Return to a simmer.
  5. Remove the pot from the heat.  Stir in the butter, then the egg yolk.  Adjust the consistency of the pudding with the heavy cream.  Serve immediately, accompanied by a taste of the cherry-brandy.
Makes 3-4 servings.


Saturday, December 3, 2011

Bread Pudding as God Intended It

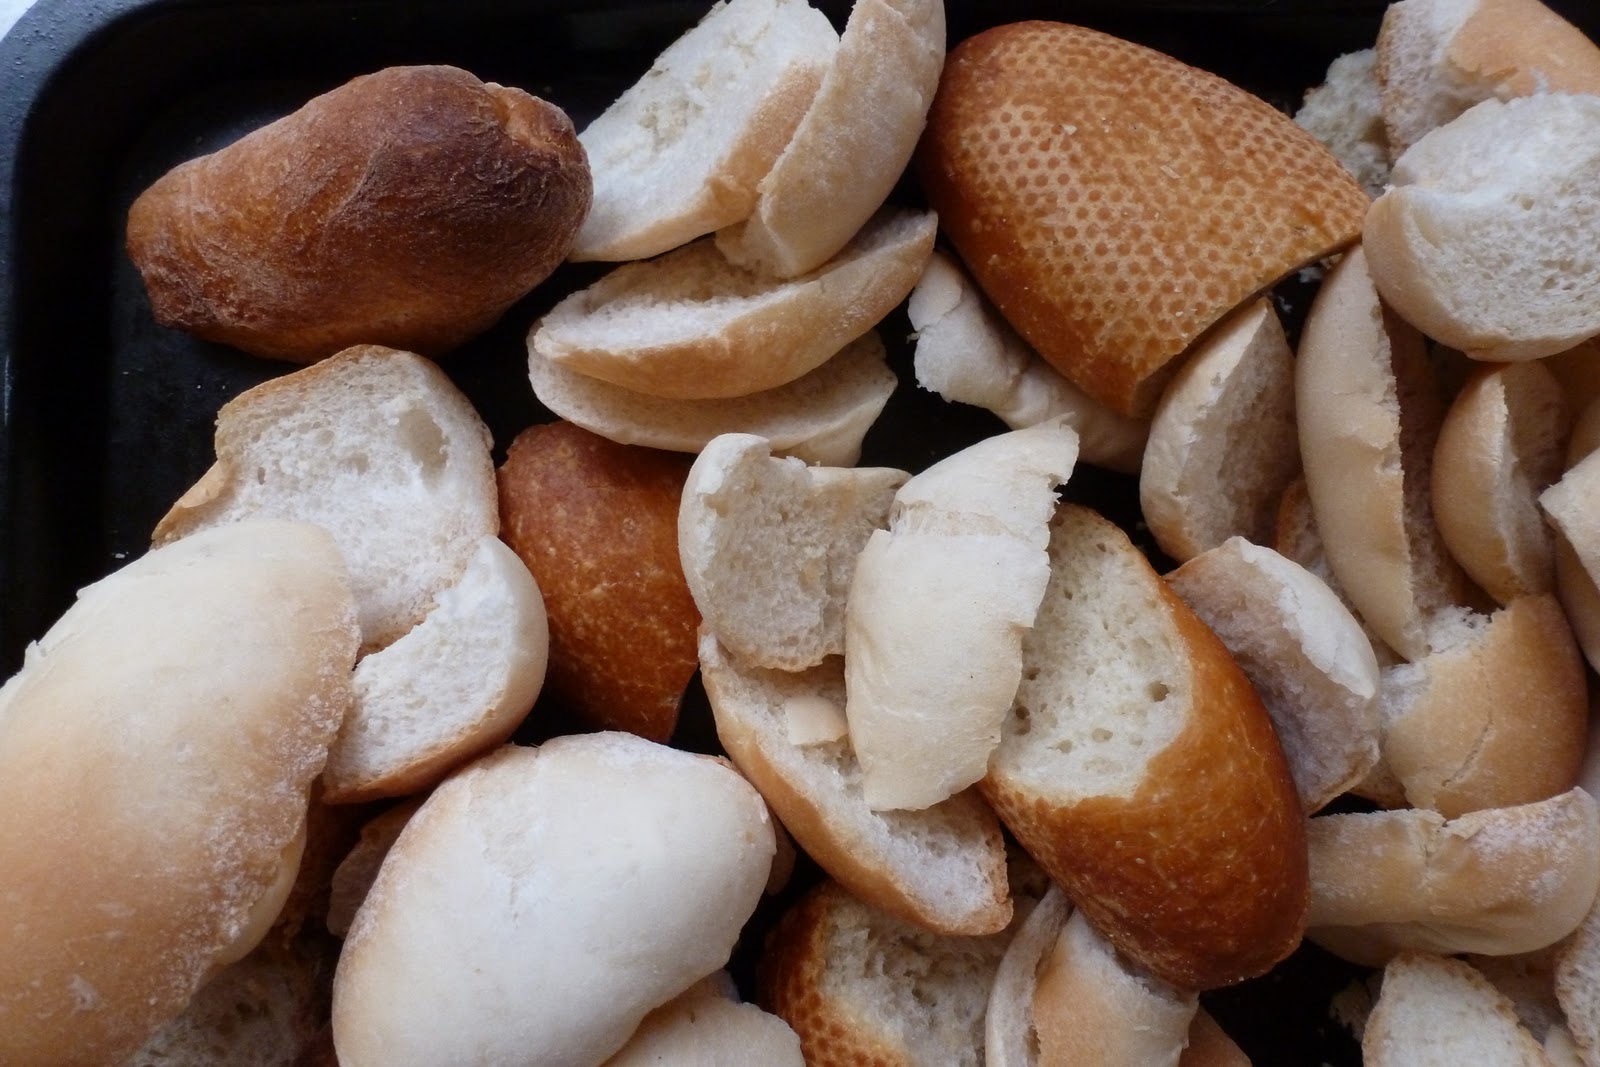
When I say, "As God Intended," I mean using actual, stale, left-over bread heels.  Buying fresh bread just to tear it up and dry it out is like using striploin to make sausage. Or rolling a torchon of foie gras just to melt it into cooking fat.


Soaked in milk and cream, mixed with eggs, sugar, and rum-soaked raisins, pressed into a casserole and baked:


The classic accompanying rum sauce: two parts icing sugar, one part butter, gently cooked to remove the starchy taste of the sugar.  Finished with a bit of egg and a lot of rum.

Once the pudding has been drenched in the rum sauce, I like broiling the dish until there are a few burnt patches.  This is a trick I picked up at Jack's.  The charred bitterness sets off the sweetness nicely.

Mincemeat 2011

I might be in love with the idea of mincemeat more than the dish itself. It's an absolutely medieval combination of flavours: dried fruit, spices, liquour, and suet.

Last year I tried Alton Brown's recipe.  It was good, though not what I was expecting. His pie is fruity, tart, and sweet.  The texture was unique: the dried fruit partially reconstitutes during baking, making for an interesting chew.

This year I made some changes:
  • I added meat to my mince.  Most recipes, including Brown's, contain only suet, but I know that my grandmother's also had beef chuck.  I heavily browned the meat before adding it to the other ingredients to develop flavour texture.
  • I used lamb suet and shoulder, instead of beef.  I happen to have lots of lamb right now.
  • I processed the mixture for a finer, more consistent texture
  • I plan on adding bread crumbs to the mincemeat before I bake it in a pie shell.  Last year the liquor and fruit juices and rendered suet bubbled over the crust.  I think that the bread crumbs will help keep that moisture in the pie.
This mincemeat will age in my fridge until the winter solstice.  I'll let you know how it turns out.


Mincemeat
2011's version, grafting my grandmother's recipe to Alton Brown's, and using lamb instead of beef

Ingredients
  • 2 tart apples, peeled, cored, and quartered
  • 8 oz sultana raisins
  • 4 oz dried sour cherries
  • 4 oz dark brown sugar
  • 2 ounces lamb suet, coarsely chopped
  • 6 oz ground lamb shoulder
  • 1 orange, zested and juiced
  • 1 lemon, zested and juiced
  • 1/4 cup spiced rum
  • 1/2 tsp freshly grated nutmeg
  • 1/4 tsp freshly ground allspice
  • 1/4 tsp freshly ground clove
  • bread crumbs
Procedure
  1. Heavily brown the ground lamb in a hot, heavy-bottomed stainless steel pan.  The meat should be a deep amber on all surfaces.  Strain the meat to separate it from any rendered fat.  Chill thoroughly.
  2. Combine all ingredients except bread crumbs in a food processor.  Pulse until ingredients are well-combined and desired texture is achieved.  Pulsing 10 times will give a mincemeat with a coarse texture.  I prefer a finer, more homogeneous texture.
  3. Transfer to an airtight container and store in the fridge atleast 1 week before using.  Keeps for 6 months.
  4. Before adding to pastry, fold in breadcrumbs.

Friday, December 2, 2011

Fruitcake 2011

It's about to get all Christmasy up in here.

Here's a simple start to the Christmas posts on Button Soup.  Last year I wrote about the importance of fruitcake.  I'm fine-tuning my recipe year to year, and I thought I'd share the 2011 version.

This year I used our local evans cherries instead of the BC bings.  They were so soft after the glacé process I worried they would be too delicate to fold into the dense pound cake batter.  While they definietly don't hold their round shape like the bings, they managed to stay in one piece.  Their tartness is a welcomed addition to the cake.  There are some cursory instructions on making glacé cherries and candying peel in last year's fruitcake post.

Maybe next year I can use beaked hazelnuts from the river valley...


Fruitcake

Ingredients
  • 8 oz unsalted butter, cubed
  • 8 oz granulated sugar
  • 8 oz eggs
  • 8 oz all-purpose flour, sifted
  • 2 tsp kosher salt
  • 1 orange, zested and juiced
  • 5 oz roasted, skinned hazelnuts
  • 5 oz glacé evans cherries, strained from liquid
  • 5 oz candied orange peel
  • approximately 1 cup of fine, spiced rum
Procedure
  1. Preheat oven to 325°F.
  2. Thoroughly butter the base and sides of a ceramic terrine and line with parchment.
  3. Combine butter and sugar in the bowl of a stand mixer.  Cream with the paddle attachment until light and fluffy, about five minutes.  Start on a low speed, and once the sugar and butter have combined, turn to medium-high.
  4. With mixer still running, add the eggs one at a time, allowing each to be fully incorporated before adding the next.  Add the orange zest and juice.
  5. Turn the mixer to  the lowest speed.  Slowly add the flour.  Stop the mixer as soon as all the flour is incorporated into the batter.  Do not over-mix.
  6. Fold in the hazelnuts, cherries, and candied peel.
  7. Transfer the batter to the prepared terrine.  Bake in the 325°F oven until the top of the cake is domed and brown, and a toothpick inserted in the centre comes out clean, roughly 60 minutes.
  8. Remove the cake from terrine and cool on a wire rack.
  9. Once cooled.  Transfer the cake to a container with an airtight lid.
  10. Store the cake at a cool room temperature, about 15°C.  Every other day for 1 month sprinkle 1 tbsp of rum over the cake, getting the liquor on all the surfaces.  I affectionately refer to this as feeding the fruitcake.

Friday, June 10, 2011

Candied Lilac

A special report from Button Soup's Senior Backyard Correspondent, Lisa Zieminek


With Allan in Austria, I have been tasked with keeping him informed of what’s happening in our new yard, and documenting developments with copious photographs and notes.

A couple weeks ago, the several lilac trees scattered throughout our yard burst into full bloom, filling the air with sweet perfume.

Last year we learned that lilacs are edible.  The tiny flowers can be added to salads for a splash of color.  They can also be made into beautiful, delicate candies that last long after the blossoms have fallen from the trees and their sweet smell has left the air.  Rather than keeping the memories of spring with mere photographs, I decided to preserve a little piece of the season in candy form, to be enjoyed upon Allan’s return.

Candied Lilac

Ingredients
  • simple syrup (heat 2 parts sugar and 1 part water to 225°F, then cool to room temperature)
  • individual lilac flowers, stems removed
  • ultrafine sugar (sold as “berry sugar”)
  • patience – it's a tedious job


Using tweezers, dip the lilac flowers in the simple syrup, shake off any excess liquid, then place them onto the ultrafine sugar.  Turn the flowers in the sugar to coat all sides, or sprinkle them with sugar to achieve the same effect.  Let the flowers dry overnight, then store in an airtight container.


The candied petals look like delicate crystals – they are a beautiful garnish for cupcakes or ice cream.  They have a crunchy texture and a sweet, floral taste.  (They are flowers, after all...)


-Lisa Zieminek, Sr. Backyard Correspondent

Saturday, March 5, 2011

Sugar Pie, and Tapping Maples in Edmonton(?)

The final course of the Button Soup Pork Dinner was sugar pie. If you are unfamiliar with this dish, let me introduce you by way of an aimless personal anecdote. If you are familiar with the dish, you can skip the next paragraph.

My father's family lives near Ottawa, my mother's near Sudbury. When I was little my family would sometimes drive between these two sets of relatives, following the Ottawa River valley, where there are lots of French communities, even on the Ontarian side of the border. Along the way we would always stop at a diner called Valois in the French town of Mattawa. For dessert they offered "sugar pie," a tidy translation of tarte au sucre. While some versions of sugar pie are made with corn syrup or molasses (
imagine a pecan pie without the pecans), I think the word "sugar" actually implies maple syrup, just as easterners might call a grove of maple trees a sugar bush, and the building where syrup is made a cabane à sucre, or sugar shack. Basically the dish is maple syrup thickened with flour and eggs, set in a pie shell.

This particular incarnation was a light, slightly sticky maple pudding in a short crust. In fact, the custard was so loose that if a slice was left to stand, the filling slowly ran onto the plate.


Sugar Pie

For the shell, bake off your favourite rich, short dough in a 10" French tart pan. I use the recipe from the CIA's Baking and Pastry text.
Be sure to dock and weight the dough while baking. Cool the shell thoroughly.

Ingredients
From The Canadian Living Cookbook

  • 500 mL maple syrup
  • 100 mL all-purpose flour
  • 250 mL cold water
  • 4 egg yolks, lightly beaten
  • 50 mL butter
Whisk the flour into the water, then stir this mixture into the maple syrup. Whisk in the egg yolks. Cook over low heat until thick. Stir in the butter. Pour into expectant pie shell. Chill thoroughly. Eat with whipped cream.


Tapping Maples in Edmonton: A Fool's Errand?


Even though maple syrup is popularly described as a "Canadian" ingredient, I consider it a highly regional specialty within Canada, as it's only made on a large scale in Eastern Ontario and Quebec. In contrast to the sugar maples that grow down east, the maple trees around Edmonton produce less, and less sweet, sap. Birch and elm can also be tapped for sap, but they have even lower yields.

These facts notwithstanding, I have a perverse obsession with maple syrup (one of my favourite desserts of all time is pouding
chômeur) as well as an abstract, academic nostalgia for the ingredient. Granulated sugar is one of the few highly refined products that I use regularly, and I'm interested in finding ways to replace it with, say, honey and maple syrup. Consider this:

For the colonists, maple sugar was cheaper and more available than the heavily taxed cane sugar from the West Indies. Even after the Revolution, many Americans found a moral reason for preferring maple sugar to cane; cane sugar was produced largely with slave labor. Toward the end of the nineteenth century, cane and beet sugar became so cheap that the demand for maple sugar declined steeply.[1]

Besides all this, making
maple syrup has an extremely low effort-to-benefit ratio: by drilling a hole in a tree and boiling the sap that leaks out, you can enjoy one of the great pleasures of the table.

Lisa and I are in the process of moving to a new house. Right now the backyard of that new house is a bit like a wrapped birthday present. The wrapping is the three feet snow that currently conceal the features of the yard. There are small tears in the wrapping, if you will: the tops of wooden stakes, promising some manner of garden; shrunken, frozen apples on one of the trees; and best of all, clinging to the topmost branches of a tall tree, those winged seed pods that fall to the ground spinning like propellers. Maple keys.

I resolved to tap this maple tree, though it is most likely of the low-sugar variety. I have only the most basic idea of how to do this.

  • Tap the tree when the sap is running. The sap runs during the spring thaw, when the days are warm and nights are cold. I thought that these conditions started last week, as there were two very warm days of rapid thaw. Then it started snowing again...
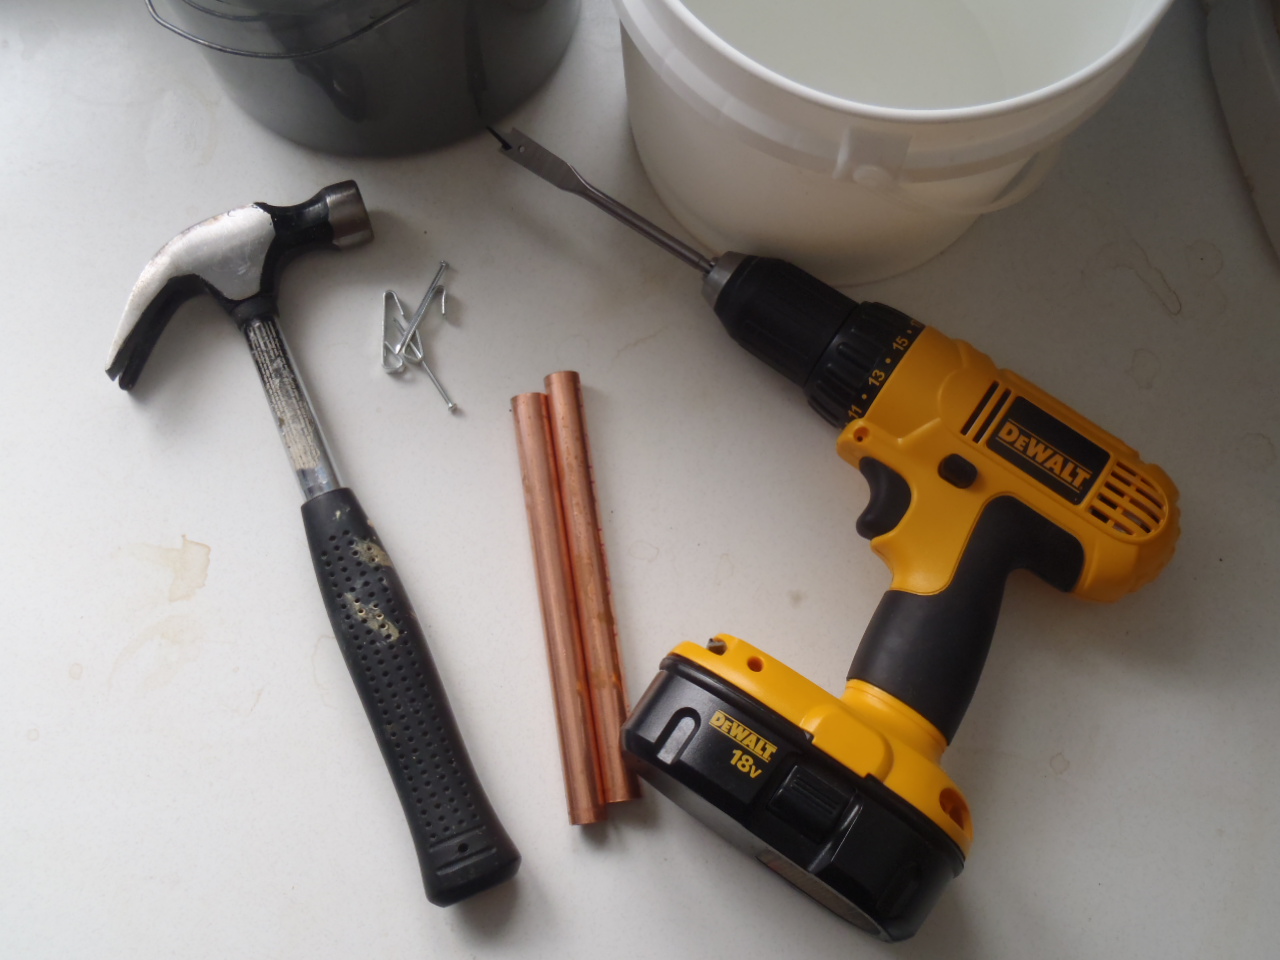
  • To tap the tree, drill a hole that is slightly smaller than the diameter of your spile (the metal spigot). The hole should go 2-3" into the trunk, at a 10-20 degree incline, anywhere 2-6' from the ground. Apparently south-facing holes have a higher yield in the earlier weeks of the sap run.
  • Lightly tap the spile into the hole and hang a bucket to collect the sap.
If I end up with even an ounce of syrup by the end of this, I'll be sure to buy proper spiles and buckets. In the meantime I'm using some 1/2" copper pipe from the plumbing section of the hardware store, and a plastic bucket supported by a wall hook. I covered the bucket with a plastic bag so that nothing falls into the sap.

Now we wait. Hopefully my premature tapping doesn't affect the process. I need a better almanac.

I'll keep you posted.


Reference


1. McGee, Harold. On Food and Cooking. ©2004 Scribner, New York. Page 668. I love this book.

Saturday, January 29, 2011

Burns Supper - Dessert: Posset and Shortbread

Posset

...I have drugg'd their possets
That death and nature do contend about them
Whether they live or die.


-Lady MacBeth, in the Scottish play (fitting, no?)


A cup of eating-posset and a shortbread cookiePosset is an old British drink of cream curdled with sack (fortified wine) or ale.

Nowadays the term usually refers to sweetened cream curdled so that it sets like a custard.

During the years in which liquid posset was declining in popularity and solid posset was rising, the term "posset" on its own was ambiguous. Qualifiers were added for clarity, resulting in terms like "rich eating posset."

Anyways, eating-posset is one of the simplest desserts to make
.

Lemon Posset
From Bon Appétit Magazine, May 2007
  • 2 1/4 cups heavy cream
  • 3/4 cup sugar
  • 3 tbsp fresh lemon juice
  • 2 tbsp fresh lime juice
Combine the sugar and cream in a saucepan and place over medium heat. Simmer for three minutes. Stir in the lemon and lime juice, then pour the mixture in the serving vessels. Leave to set in the fridge overnight.


ShortbreadShortbread cookies cooling on a rack
Adapted from a recipe of the same name in the Culinary Institute of America's Baking and Pastry, Second Edition.

Many would not consider this cookie a shortbread, as shortbread is usually virginal white. I happen to like the molasses and bran flavours of this (pardon the pun...) "less refined" version. These cookies are very crisp, and lack the powdery mouthfeel of some shortbreads.
  • 8oz cake flour
  • 8oz whole wheat flour
  • pinch of salt
  • 11oz butter
  • 5oz white sugar
  • 8oz brown sugar
Sift together the flours and salt. Using the paddle attachment of a stand-mixer, cream the butter and sugars at medium speed for about five minutes. Gradually add the flours and salt to the butter and sugar while mixing slowly. Scrape down the sides of the mixer bowl for even incorporation. Refrigerate the dough until stiff but still workable.

Roll the dough to 1/4" thickness. Cut into desired shapes, then transfer to a heavy sheet pan covered in parchment. Refrigerate the pan for thirty minutes before baking at 350°F until the edges of the cookies are a light golden colour, roughly twenty minutes.

At the Burns Supper, these shortbread cookies were served on top of the eating-posset, with one end hanging over the bowl. The idea was to dip the cookies in the posset à la Dunkaroos.

Monday, December 20, 2010

Yule Log Cake

My mom has prepared a yule log cake every Christmas I can remember. I have no idea how this tradition came to my family, as it is extremely French ("bûche de noël"), and we are not.

The cake is a simple sponge. Whole eggs are beaten thoroughly, sugar is added, then a bit of water, and finally flour and cocoa are folded in. The batter is runny, and forms a shallow, uniform, fine-textured cake after baking.

The interior icing is a buttercream made by whipping room-temperature butter into Swiss meringue. Swiss meringue is a mixture of whipped egg whites and simple syrup cooked to soft ball stage.

The exterior frosting is icing sugar beaten into lard, which makes the colour bright white, in contrast to the beige buttercream inside the log.

I dragged a fork across the exposed sides of the cake for a bit of texture.

Sunday, December 19, 2010

Wheat Pudding

I don't cook rice very often, but I used to work at a restaurant that let me take home large amounts of leftover rice, and over the years I have developed a taste for rice pudding. My favourite version is
made with a blend of brown and wild rice (which adds a satisfying chew to the dish), and dried saskatoons.

Lately I've been wondering if I could make a similar dish with a starch that is more common in my kitchen. Take that fifty pound bag of wheat berries in my closet, for instance. The one that I keep threatening to grind into flour if it doesn't make itself more useful.

I was wary of trying to adapt wheat to a rice pudding dish. When I first started cooking with wheat berries, I thought I could treat them like rice. I made some disastrous attempts at "risotto-style wheat" and "wheat pilaf." No matter how long I cooked the berries, they never seemed to burst like wild rice, or release their starch like short-grain rice, or stick to each other like pilaf. They were tasty and enjoyably chewy, with a little pop as you bit through the bran, but they just rolled around on the plate, and didn't form a cohesive starch like rice.

Lately I've been reading about the traditional Ukrainian Christmas dinner, a meal of twelve meatless courses, looking for ideas on winter meals. When reading about the main ingredients in their feast, I kept thinking, "I have that in my pantry... I canned tons of that this fall... I know where to find that...," items like dried mushrooms and fruit and sauerkraut and potatoes. It sounds like the Ukrainian landscape is very similar to ours, which makes the Ukrainian culinary repertoire a useful resource.

The first course of the dinner is usually a dish called kutia: boiled wheat berries, sweetened with honey, often flavoured with poppyseeds, served cold.

Kutia recipes gave me a method for bursting the kernels of wheat and shortening their cooking time. The key is to dry the wheat in a low oven for an hour. I'm not sure exactly why this works. Maybe drying the berries weakens the cells walls and lets the boiling water penetrate more easily. I don't know. But after drying for an hour, then soaking overnight, the berries burst after only a couple hours of boiling.

Once the cooking liquid is reduced, the dish has a great texture. I half expected the mixture to be gluey, but it's surprisingly creamy, with the exploded bran giving a good chew-factor.

At the end of cooking, I added honey, salt, dried cranberries, and a bit of butter. For a looser pudding add cream.

My only qualm is the slightly grey colour of the pudding, a flaw that I'm willing to overlook simply because it's so tasty.

Saturday, December 18, 2010

Sugar Plums

Here's another dried-fruit preparation with a baffling name.

Sugar plums are one of those items that are common in Christmas carols and stories and yet are basically unknown to modern revelers. (Other examples: wassail, yule, and figgy pudding. Furthermore, I've never seen mistletoe before, and I just saw real holly for the first time a few weeks ago, at the farmers' market. I got excited, grabbed the leaves, and stabbed myself.)

My dictionary defines a sugar plum as a small ball of candy, and nothing more. There are not necessarily any plums in sugar plums.

The word "plum" is associated with dried fruit, and good modern dictionaries still give one of the many meanings of "plum" as "a raisin." As such, the most common manifestation of sugar plums is dried fruit and nuts, chopped, sweetened, bound with honey, and rolled into little balls. A good winter treat for Edmonton. We're not awash with the fleshy fruits that lend themselves to drying, like apricots or figs, but there are lots of cherries and plums to be had. Even if you can't find any from within the city, in the late fall the farmers' markets are always full of dried fruit and nuts from BC.

Friday, December 17, 2010

Mincemeat

This is a dish that confused me for some time. "Minced" means broken up (it's actually related to the word "minute," as in exceedingly small). The British use the word "minced" in places we might use the word "ground," so when I started hearing about mincemeat pies, I assumed they were meat pies.

Then certain people (Lisa, Alton Brown) tried to explain to me that there was no meat in mincemeat pies at all, just dried fruit.

Just as I started grappling with the idea of a meatless mincemeat, I found one of my grandma's recipes which seemed to combine the aforementioned concepts. The ingredients:
  • beef
  • suet
  • apples
  • dried currants
  • sultana raisins
  • citron (I believe this refers to candied lemon peel, not actual citron fruit...)
  • cider (knowing my grandma, non-alcoholic)
  • spices
The ingredients were chopped, cooked, and canned.
I'm still trying to come up with a definition. "Dried fruit, usually with fat, sometimes with meat," might work, but, "Dried fruit and whatever else you have on hand" is probably the safest. This week I had suet, apple preserves, dried cranberries, dried currants, raisins, and brandy.  I worked off this recipe, from Alton Brown.

I was initially excited about the preserving potential of mincemeat, but most of the ingredients are already shelf-stable, and those that aren't (beef, apples) are probably best preserved in other ways. At any rate, the mix keeps very well, and actually benefits from storage, much like fruitcake. It makes a great pie. Most recipes call for a sweet crust, but I think a well-salted crust made with lard gives a good contrast to the sweetness of the filling. The partially reconstituted fruit has a very satisfying chew.

Thursday, December 16, 2010

Fruitcake

The waiting is the hardest part.

-Tom Petty and the Heartbreakers


I used to revile fruitcake, but in recent years a description by Jeffrey Steingarten has made me more receptive to the dish.

...full of dark, saturated medieval tastes and colors... aged for a year and then set aflame at the very last minute, carefully spooned out like the treasure it is...

I became mildly interested in the idea of aging baked goods, but I still regarded fruitcake as a gaudy curiosity. Then I came across fruitcake in the memoirs of a woman who grew up during the depression in Northern Ontario, called On Turnips, Teas, and Threshing Bees. Her description of fruitcake, and the lengths her family went to prepare it, surprised me. They started collecting ingredients early in the fall, candying ripe fruit. Later in the year they had to seed all the Muscat raisins and crack the walnuts by hand.

Even the eggs were a luxury. Apparently chickens have only recently decided to lay eggs all year long (persuaded by better feed and warmer barns?). Her family preserved the last of the fall's eggs expressly for the Christmas fruitcake. They kept them in a jelly she called water glass, which is sodium silicate. Storing the eggs for months was a considerable sacrifice for her family, as during the depression eggs were one of the few bartering items they had to trade for necessities like flour.

Living in the Canadian shield, spruce was the main wood for ovens and furnaces. Hardwood was comparatively rare, but a few chosen logs were set aside for the fruitcake, which needed to bake at low temperatures. They cherished this cake.

I decided to reconsider my position on fruitcake this year with a simple trial: a single loaf with glacé cherries, candied orange and lemon peel, and hazelnuts.

Glacé cherries"Glacé" is a confusing term because it can refer to ice cream, cake frosting, fruit candied in "hard crack" syrup, or simply fruit preserved in syrup. It's that last definition that applies here. Most sources I consulted had a similar procedure for making glacé cherries:

Make a simple syrup of one part water and one part sugar.  Bring to a simmer, add pitted cherries, remove pot from heat, cover and let stand over night.  This is simply to infuse the syrup with cherry, and the cherries with syrup. The next day, remove the cherries and reduce the syrup until a candy thermometer reads 230F.  This gives a good thick-but-runny consistency.   Reintroduce the cherries, simmer briefly, then store in a sanitzed jar.


Candied Peel

Candied peel is dead simple to make. Remove the peel from lemons and oranges. Use proper, thick-skinned oranges like navel, not thin-skinned mandarins. Cut into strips.

The peel is usually blanched to remove some of the bitterness of the pith (the fleshy white part). Put the peels in cold water and bring to a boil. Strain and repeat. Strain and repeat.
After blanching, boil the peels in simple syrup until translucent (see left). Remove and roll in sugar. Soak the peels in water or liquor before folding into the cake batter.

Batter
I made a simple, dense, pound cake of equal parts butter, sugar, eggs, and flour, by weight. If you cream the butter and sugar well enough, there's no need for baking powder. I added the zest of one lemon, then folded in my cherries, candied peel, and hazelnuts.
The doneness of the cake depends on how you intend to store the specimen until Christmas. If you're just throwing it into the fridge, it's important that you slightly under-bake the cake, so that it remains moist. If you're going to be steeping the cake in alcohol, bake the cake as you normally would, until a knife inserted in the middle comes out clean.


Aging

If you're taking the alcoholic route, keep your cake in a non-reactive container at room temperature. Every couple of days, sprinkle rum or brandy onto the top and sides of the cake. Alton Brown uses a spray-bottle to achieve a uniform mist of liquor. I partially block the bottle opening with my thumb and pour.


Results
After a few weeks aging, the cake is dense, moist, and redolent of fruit peel and rum. It's remarkable how the flavours develop over the weeks. This is definitely going to be a tradition in my house.


Wednesday, December 15, 2010

Gingerbread Church with Stained Glass

Lisa had a great method for making a stained glass effect on gingerbread houses, so we decided to make a church.

Our gingerbread is a standard recipe from a Jean Paré cook book. This was my first time making gingerbread, and also my first time realizing that most of the tastes I associate with gingerbread are actually from the molasses.

For the stained glass, we bought hard candies and crushed them to make coloured sugars. After the gingerbread was baked off, we set the cookies on parchment, then filled the window-holes with the coloured sugar. After baking for a few minutes, the sugar melts, and once it cools it resembles glass.

Just as the windows come out of the oven, the melted sugar can be manipulated with a toothpick to create designs.

Our gingerbread is bound with classic royal icing.

The roof is made of slivered almonds.


Gingerbread church blueprints
Cutting the gingerbread
The baked gingerbread, cooling on a rack
The crushed candies
The windows, filled with coloured, powdered sugar
The rear window, filled with coloured, powdered sugar
The rear window after baking and manipulating with a toothpick
Making the royal icing
A front-view of the finished gingerbread church
A rear-view of the finished gingerbread church

Thursday, December 9, 2010

Winter Food

Throughout late summer I found myself craving winter food. When I was filling my rumpot with fruit and canning my sauerkraut it was twenty degrees outside, but I was thinking of the dead of winter, and the rich, warming, comforting food I would enjoy.

Preservation of food has become central to my idea of local cuisine. I've always included meat in my concept of preserving for the impending winter, but I recently realized that this doesn't make much sense.

Before refrigeration, fresh meat could only be kept in the winter. Of course you could kill a chicken in the summer and eat it for dinner, but what if you were to kill a cow and not have a freezer? My great grandparents associated summertime with pickled meat. Butchering was largely done in the colder months, so they were much more likely to enjoy fresh meat in the winter than the summer.

I'm oversimplifying, but you could say that they ate fresh vegetables and pickled meat in the summer, and pickled vegetables and fresh meat in the winter.

This realization turned my idea of winter food on its head, and I started thinking of ways to use the cold weather in cooking. Now and again I'll cool large pots of stock in a snowbank, but there are some preparations that have a more significant dependence on the cold. For instance...


Boiling maple syrup on snowMaple Taffy

Using snow to make candy has been done for centuries in Canada. Toffee, for instance, was invented in Quebec. According to Larousse, a sixteenth century nun set molasses in the snow to attract young natives to her school.

Rapidly cooling sugar syrups helps prevent the growth of crystals, and results in a clear, glassy appearance.


The process is simple enough. Start with maple syrup in a pot over medium heat. The higher the concentration of sugar in a syrup, the higher the temperature at which it boils. The maple syrup will start to boil just above water's boiling point of 212°F. As moisture evaporates and the sugar becomes more concentrated, the temperature of the syrup will rise. The relationship between sugar content and boiling point is direct and predictable: a syrup of 85% sugar will boil at 235°F, a syrup of 90% sugar will boil at 270°F. Candy thermometers are your friends.

Resist the temptation to stir the pot, especially in the later stages of boiling, as you might induce crystalization.

The maple taffy on a wooden stickHeating the syrup to 235°F will yield a sticky, slightly runny though still manageable taffy. I like this stage because it is a little messy. Higher temperatures yield firmer taffies.

As soon as you reach your desired temperature, pour the syrup over clean snow. Wait maybe ten seconds for the syrup to cool, then pick up the taffy by winding it around a popsicle stick or wooden spoon.

Sugar shacks do this in early spring, during the sap run, so that visitors can taste the first syrup of the season. With few hard maples being tapped around Edmonton, this is as much a celebration of the snow as it is the maple. Maybe a good tradition for the first snow fall, rather than the spring.